

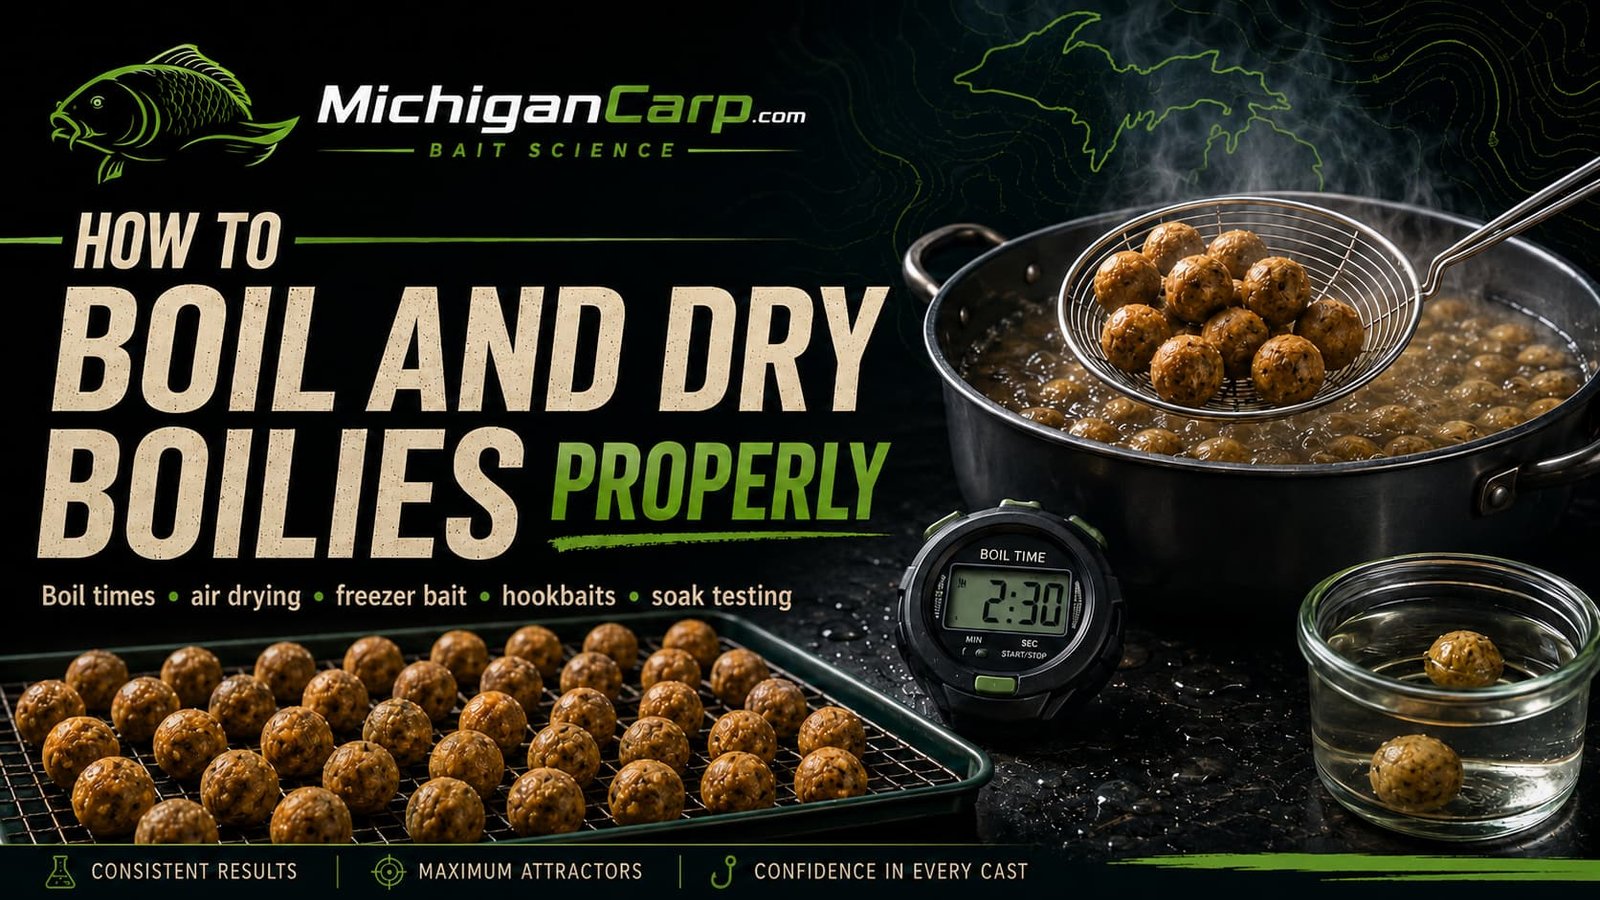
Learning how to boil and dry boilies properly is one of the most important practical skills in homemade carp bait making.
A good base mix can still fail if the boilies are under-boiled, over-boiled, dried badly, bagged while warm, frozen too wet, stored without enough moisture control, or trusted before they have been soak tested.
Boiling and drying are not just finishing steps. They control how the finished bait handles, hardens, leaks, stores and fishes.
Boiling makes the bait fishable. Drying makes the bait usable. Soak testing tells you whether it is actually right for the job.
This article is the practical workflow guide. It explains how to boil homemade boilies, how long to boil different sizes, how to dry freezer bait and hookbaits, when to glug, when to freeze, how to avoid common mistakes and how to test the finished bait before trusting it on the lake.
For the deeper heat and structure science, read What Boiling Does to Carp Bait. For drying, moisture and storage risk, read Water Activity in Boilies. For the final physical checks, read How to Test Boilies Before Fishing.
This guide also connects with Potassium Sorbate, Sodium Benzoate and Citric Acid in Shelf-Life Boilies, How to Prepare Boilies for Carp Fishing, How to Make Wafters and Pop-Ups From a Boilie Base Mix, How to Formulate a Milk, Nut and Birdfood Boilie Base Mix and the main Bait Science hub.
For external technical background, see FDA: Water Activity in Foods and OpenStax: The Dissolution Process.
Table of Contents
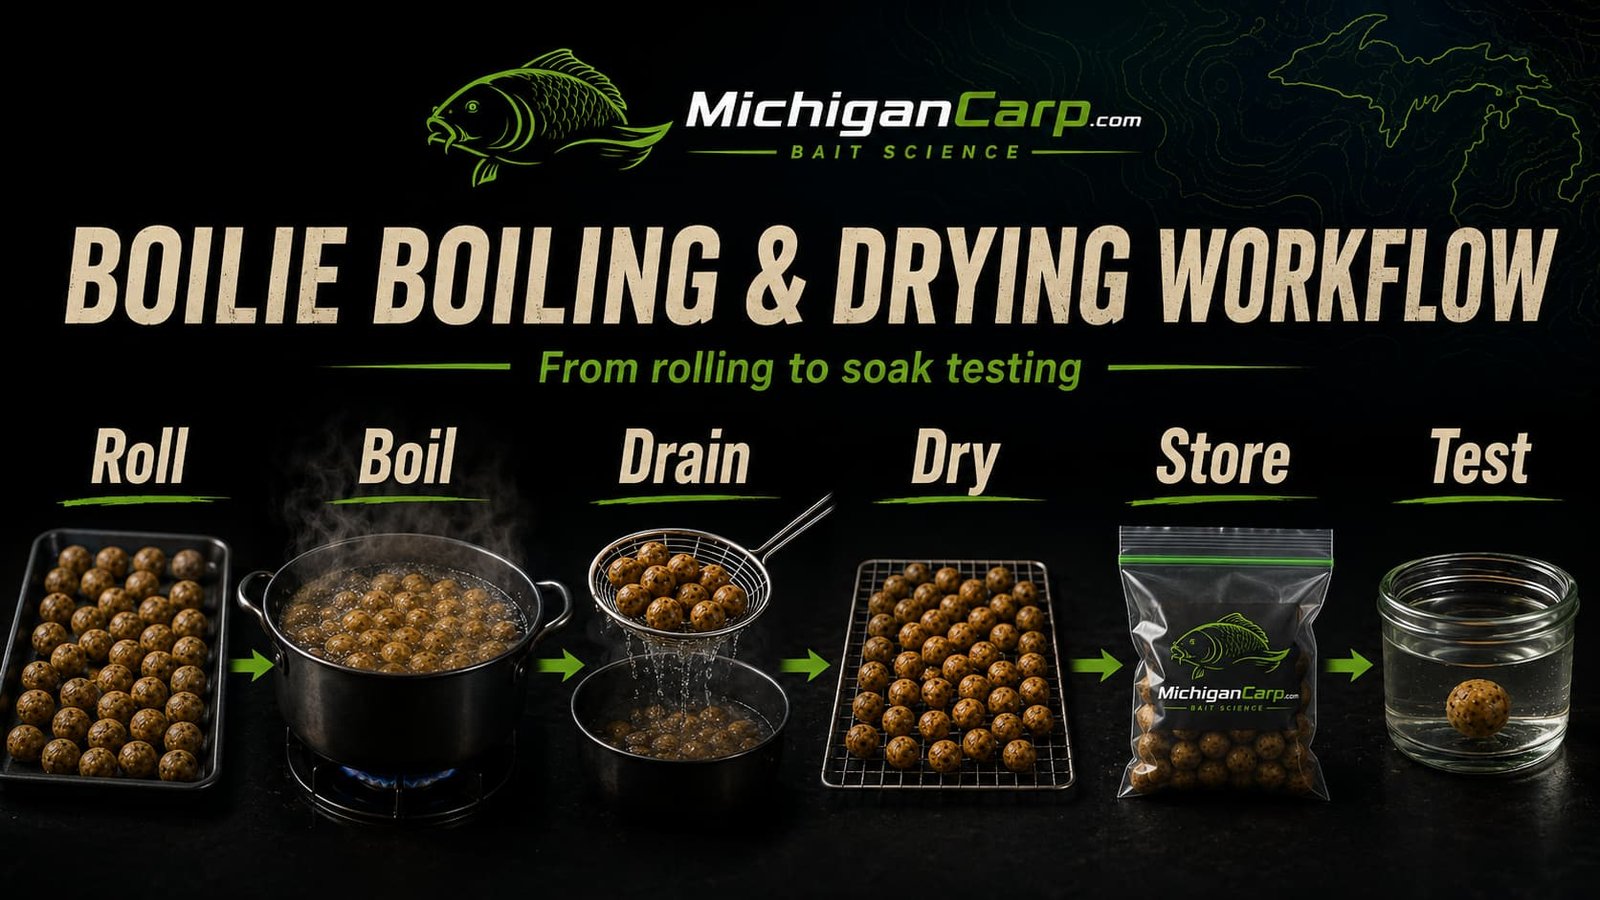
Quick Start: Boil and Dry Workflow
The basic boilie workflow is simple, but every step needs to be repeatable.
| Step | What to do | Why it matters |
|---|---|---|
| 1 | Roll evenly sized boilies | Even bait cooks and dries more consistently |
| 2 | Bring a large pan of water to a rolling boil | Stable heat gives repeatable results |
| 3 | Add a small batch of boilies | Overloading the pan drops temperature and ruins timing |
| 4 | Start timing when the water returns to a rolling boil | More consistent than timing from the moment bait enters the pan |
| 5 | Boil according to bait size and purpose | Free bait and hookbait do not need identical firmness |
| 6 | Remove with a spider strainer or slotted spoon | Fresh boilies can deform while soft |
| 7 | Drain well | Surface water slows drying and encourages clumping |
| 8 | Spread in a single layer | Prevents sweating, flat spots and uneven drying |
| 9 | Air-dry according to bait purpose | Freezer bait, hookbaits and shelf-life bait need different drying logic |
| 10 | Soak test before scaling up | The finished bait in water is what matters |
Most homemade boilie problems come from four mistakes: too much bait in the pan, guessed boil times, poor drying airflow and no soak test.
Do not judge boilies only by how they look when they come out of the pan. Judge them after drying and soaking.
[IMAGE PLACEMENT: BASIC WORKFLOW — boilie-boiling-drying-workflow.png]
Alt text: Homemade boilie boiling and drying workflow showing rolling boil, small batches, timer, draining, drying racks, freezer bags and soak testing.
Before You Boil: Paste, Batch Size and Equipment
Boiling cannot rescue bad paste.
Before the bait goes into the pan, the paste should roll cleanly, hold sausage shape, cut evenly, roll without tearing, and produce boilies that are not badly cracked, sticky, dry or slumped.
| Problem before boiling | What may happen later | Possible correction |
|---|---|---|
| Paste too sticky | Boilies stick, deform, dry slowly or soften too much | Rest the paste, reduce liquid next time, add a little semolina, maize meal or birdfood |
| Paste too dry | Boilies crack before or after boiling | Add a little egg or liquid, mix longer, rest the dough, reduce hard binder if overdone |
| Paste too soft | Bait remains weak after boiling and soaking | Reduce oil or syrupy liquids, improve dry structure, increase drying or test slightly longer boil |
| Coarse ingredients too large | Rolling problems, cracks and weak structure | Grind or sieve more carefully, or adjust binder and moisture |
| Paste dries during rolling | Later baits differ from early baits | Cover unused paste and work in smaller batches |
Equipment does not need to be complicated. A large stockpot, spider strainer or slotted spoon, timer, drying racks or mesh trays, clean towels, labels, freezer bags and a notebook are enough for most home bait making.
The pan matters more than many anglers think. Use enough water that the boilies move freely and the pan returns to a rolling boil quickly after bait is added. It is better to boil four consistent small batches than one overloaded batch.
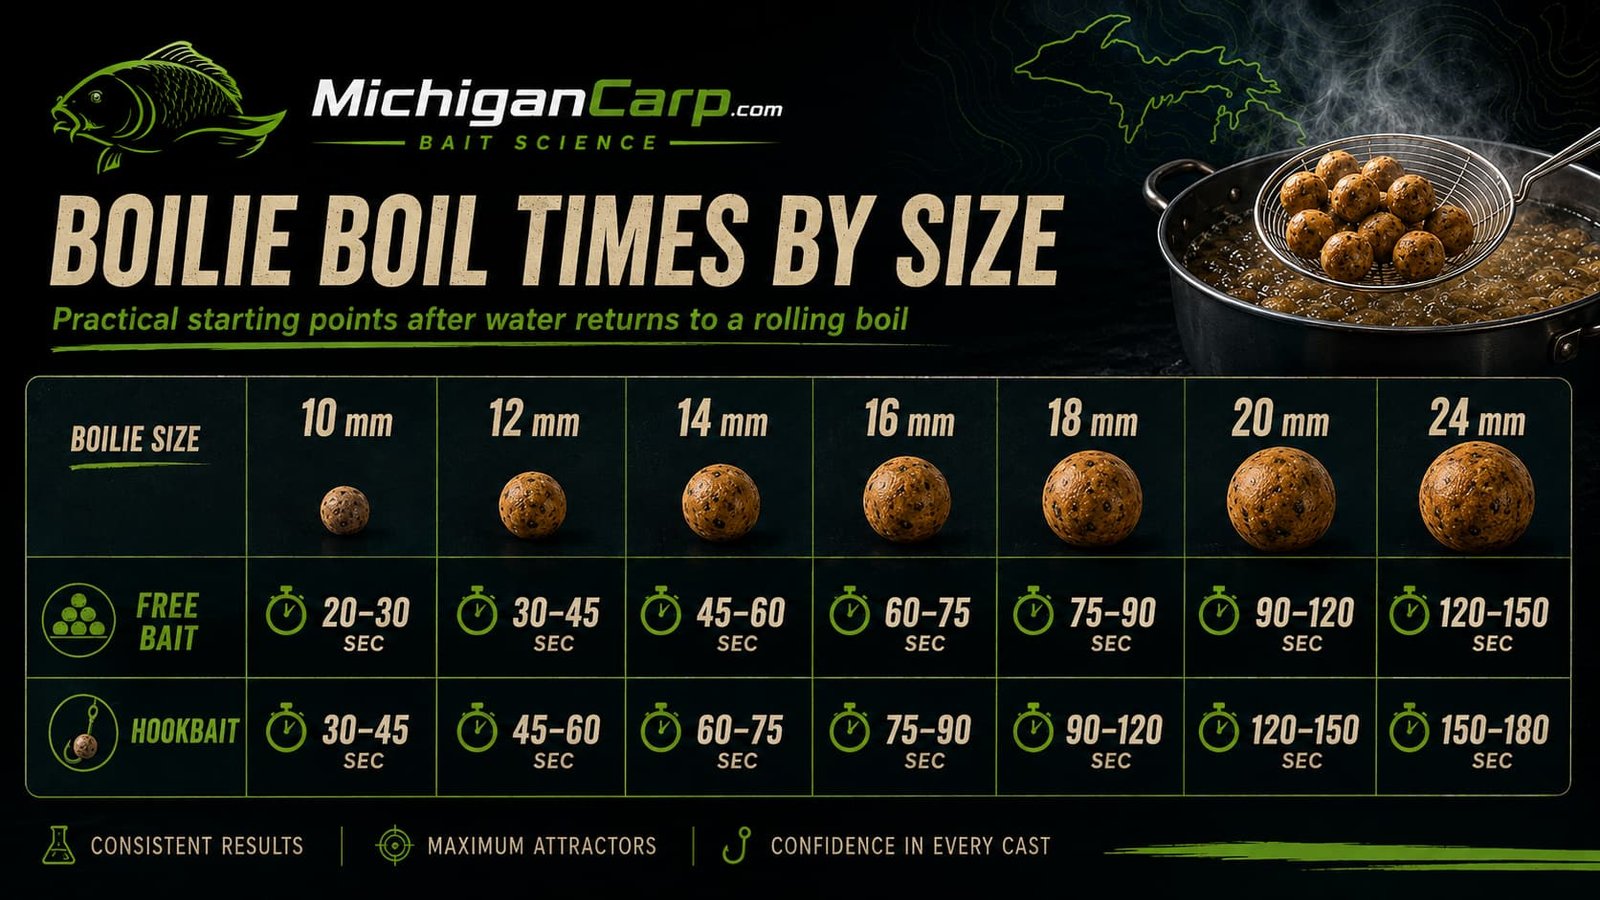
How Long to Boil Boilies
There is no universal boil time for every recipe.
Bait size gives a starting point, but the correct boil time depends on recipe, egg level, albumen, milk protein, starch content, fat level, coarse ingredients, bait diameter and whether the bait is free bait or hookbait.
Start timing once the water has returned to a proper rolling boil after the bait is added.
| Bait size | Free bait starting point | Hookbait starting point |
|---|---|---|
| 10 mm | 20–30 seconds | 30–45 seconds |
| 12 mm | 30–45 seconds | 45–60 seconds |
| 14 mm | 45–60 seconds | 60–75 seconds |
| 16 mm | 60–75 seconds | 75–90 seconds |
| 18 mm | 75–90 seconds | 90–120 seconds |
| 20 mm | 90–120 seconds | 120–150 seconds |
| 24 mm | 120–150 seconds | 150–180 seconds |
These times are starting points, not laws.
For most free bait, start toward the lower or middle range and test the finished bait. For hookbaits, start toward the middle or upper range because they need more durability. For specialist hard hookbaits, longer boil times can be tested, but they should not become the default for ordinary free bait.
Boil free bait for controlled texture. Boil hookbaits for durability. Do not treat them as the same product.
What Boiling Should and Should Not Do
Boiling should make the bait easier to handle, form a usable outer skin, firm the paste, reduce raw-paste weakness and prepare the bait for drying.
It should not turn every bait into a hard marble.
| Observation | Possible meaning | What to do |
|---|---|---|
| Bait collapses when lifted | Under-boiled, weak paste or poor binder | Test slightly longer boil and review paste structure |
| Bait splits badly during boiling | Paste too dry, coarse ingredients, poor rolling or heat shock | Adjust moisture, mix and rolling consistency |
| Bait becomes rubbery | Over-boiling or over-set structure | Reduce boil time, especially for free bait |
| Bait feels washed out | Long boil or dirty pan water | Use smaller batches and change water more often |
| Bait floats during boiling | Air, steam, skin formation, density change or buoyant ingredients | Do not use floating as the only timer |
| Water becomes thick and dirty | Starch, protein, sugar, colour, oil and fines are collecting | Change water if it foams, coats bait, smells stale or affects the surface |
Rinsing boilies after boiling is usually unnecessary. For normal bait making, remove them, drain them and place them on racks. Rinsing can wash away surface material and change drying. It may only make sense if the pan water is extremely dirty, bait is coated in slime, or you need to stop surface cooking quickly.
Salted boiling water is also usually unnecessary. If salt or minerals belong in the bait, add them deliberately to the recipe, liquid phase, glug, post-boil treatment or carrier bait rather than relying on inconsistent pan water.
Draining and Cooling After Boiling
Once boilies leave the pan, they need to steam off and lose surface water.
Do not dump hot wet boilies into a sealed bucket or plastic bag. That traps steam, creates sweating, slows drying and can damage texture.
| Good draining method | Why it helps |
|---|---|
| Remove with a spider strainer or slotted spoon | Avoids crushing soft fresh boilies |
| Shake gently over the pan | Removes loose surface water |
| Place briefly on a clean towel or rack | Lets excess water drain before drying |
| Move to racks in a single layer | Allows air to reach the bait |
| Separate touching boilies | Reduces flat spots and stuck bait |
| Label the batch | Connects boil time and drying time to later testing |
Good draining makes good drying easier. Poor draining causes poor drying.
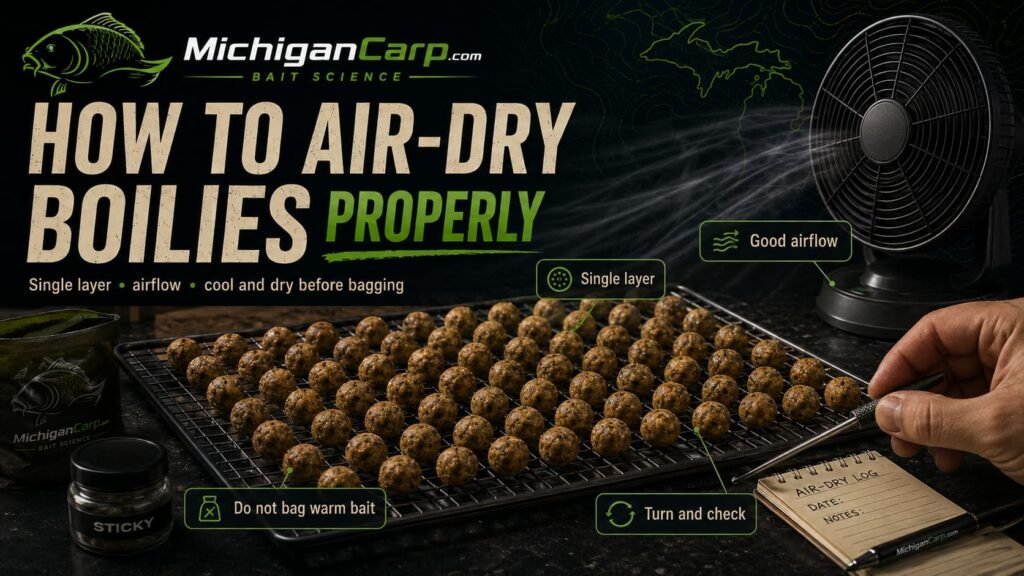
How to Dry Boilies Properly
Air-drying boilies means removing moisture with airflow.
Good drying requires single-layer bait, clean airflow, cool to moderate room temperature, low humidity where possible, occasional turning or shaking, and no sealed container until the bait is cool and surface dry.
| Drying surface | Use or avoid? | Reason |
|---|---|---|
| Mesh bait trays | Use | Good airflow around the bait |
| Cooling racks | Use | Good for small home batches |
| Air-dry bags | Use after initial drying | Good for short-term toughening |
| Clean towels | Use briefly only | Good for draining, poor for long drying if damp |
| Deep buckets | Avoid | Trap moisture and create uneven drying |
| Plastic bags | Avoid while bait is warm or wet | Cause sweating and clumping |
| Harsh direct sun | Avoid unless tested | Can crack the outside while the inside stays moist |
A fan can help in humid weather, but do not blast bait with heat. Clean airflow is usually better than trying to cook the bait dry.
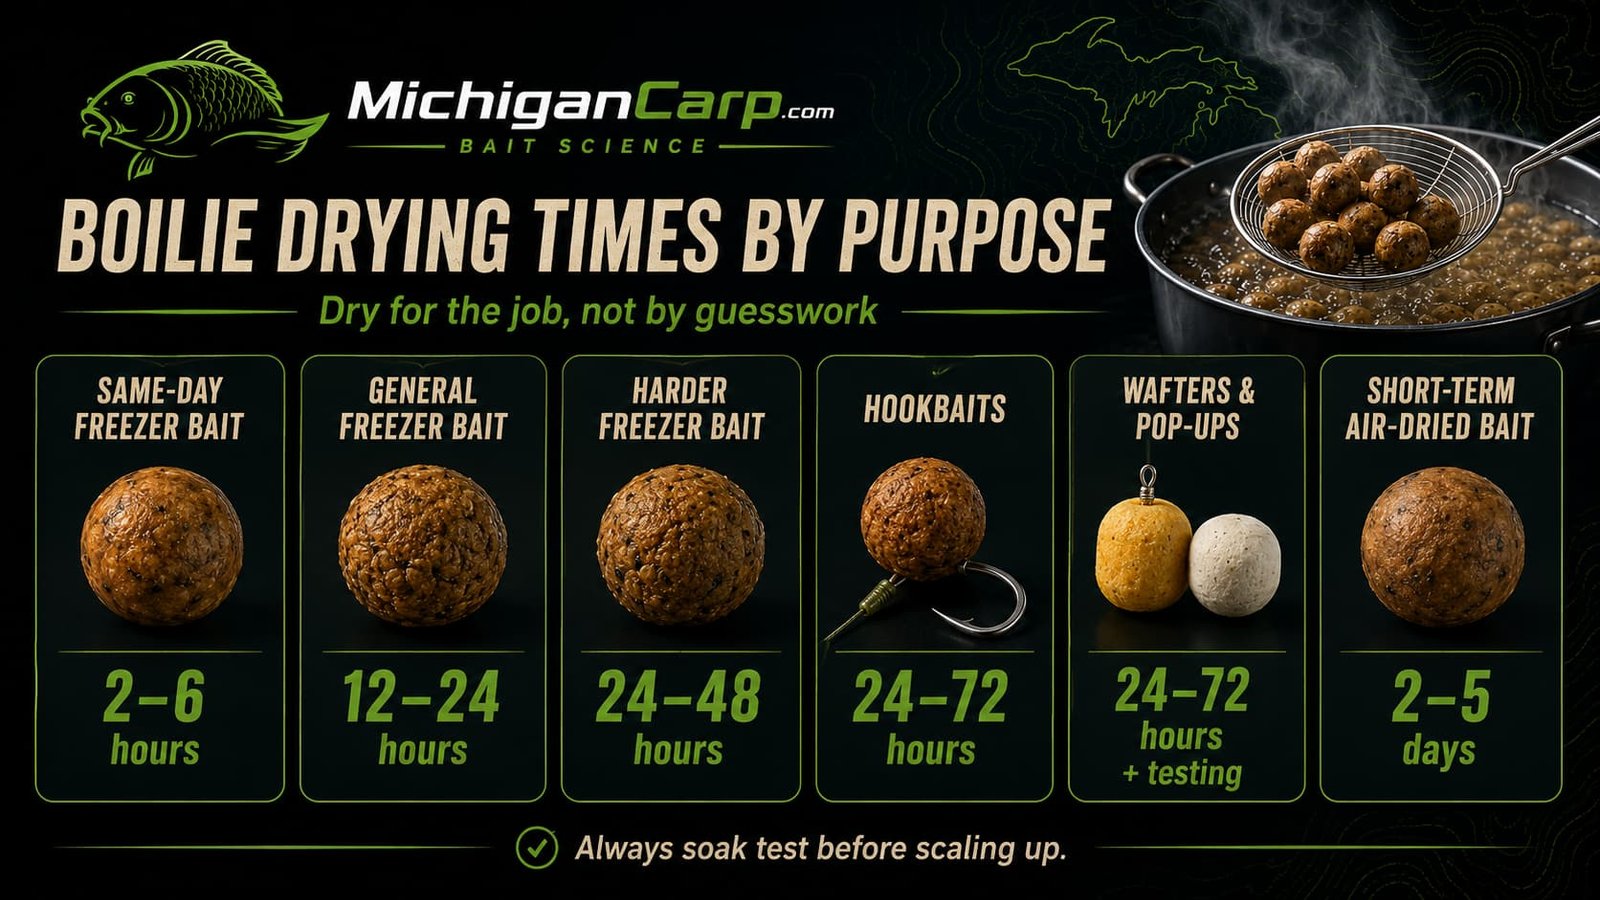
Drying Times by Bait Purpose
Drying time depends on bait size, recipe, humidity, fat level, drying surface and what the bait is meant to do.
These are practical starting points.
| Bait purpose | Drying time | Main goal |
|---|---|---|
| Same-day freezer bait | 2–6 hours | Surface dry enough to fish or bag briefly |
| General freezer bait | 12–24 hours | Cool, surface dry and firm enough to freeze |
| Harder freezer bait | 24–48 hours | More durability for longer sessions |
| Hookbaits | 24–72 hours | Better hair, screw and soak resistance |
| Wafters and pop-ups | 24–72 hours plus testing | Stable buoyancy and skin after soaking |
| Short-term air-dried bait | 2–5 days | Tougher bait for travel or short-term use |
| Shelf-life bait | Formula-dependent | Requires preservation, water-activity control and storage testing |
A small 14 mm birdfood bait may dry faster than a 24 mm milk, nut and seed bait. A high-fat bait may dry more slowly than a lean cereal bait. A casein-heavy hookbait may continue hardening for days.
Drying should always be connected to testing. If the bait dries for 24 hours but collapses after a six-hour soak, the drying time was not enough for that job. If the bait dries for several days and becomes rock hard with poor release, it may be overdone for free bait.
Freezer Bait, Hookbaits, Wafters and Pop-Ups
Freezer bait, hookbait, wafters and pop-ups should not all be dried with the same logic.
| Bait type | Drying logic | Testing priority |
|---|---|---|
| Freezer bait | Cool, surface dry, not wet or steaming, portioned and frozen | Thawing texture, softening and water behaviour |
| Harder freezer bait | Longer drying where durability is needed | Whether it still leaks and softens enough for free bait |
| Hookbaits | Longer drying and sometimes longer boil time | Hair hole, bait screw, casting, soak time and nuisance resistance |
| Wafters | Drying can change balance | Sink rate and balance with the actual hook and rig |
| Pop-ups | Drying and soaking can change lift | Buoyancy after the intended soak time |
Do not glug boilies heavily while they are still hot and wet from boiling. Let them cool and surface dry first. Heavy glugging usually works better after the bait has stabilized. Light sprays can be used earlier, but long conditioning is better after initial drying.
For freezer bait, dry enough that the bait is cool, surface dry and not steaming before bagging. Portion into session amounts, label with recipe, flavour, date, size, boil time and drying time, and avoid repeated thaw-refreeze cycles.
For hookbaits, test after the actual soak time you expect to fish. A bait that is fine after 10 minutes may fail after 12 hours.
Shelf-Life Warning: Dry Is Not Preserved
Shelf-life bait is not just dried bait.
Drying helps reduce moisture, but true shelf-life bait depends on recipe, preservative system, pH where relevant, water activity, packaging, hygiene, storage temperature, fat stability and retained-sample testing.
A boilie can feel dry on the outside and still contain enough available moisture to spoil.
Do not assume hard means shelf-stable. Do not assume air-dried means preserved.
For my own shelf-life bait work, the practical preservation system is not potassium sorbate alone. It uses potassium sorbate, sodium benzoate and citric acid together, with drying, hygiene, storage observation and retained-sample testing. That does not automatically prove a six-month shelf life unless the bait is tested properly.
For the full preservation guide, read Potassium Sorbate, Sodium Benzoate and Citric Acid in Shelf-Life Boilies. For the moisture and available-water side, read Water Activity in Boilies.
Weather, Humidity and Bait Type Adjustments
Drying is not the same every day.
Humidity, room temperature, airflow and bait composition all change how long drying takes and what problems appear.
| Condition or bait type | Watch for | Practical adjustment |
|---|---|---|
| Humid weather | Slow drying, tacky surfaces, mold risk | Use thinner layers, more airflow and smaller batches |
| Cold weather | Bait feels firm but holds moisture | Extend drying and test before storing |
| Hot weather | Surface cracking, case-hardening, oiling-out | Avoid harsh heat and dry with controlled airflow |
| High-fat milk/nut bait | Greasy surface, slow drying, bait sticking in bags | Reduce oil/fat pressure, improve airflow and test after soaking |
| Casein or milk-protein bait | Hardening more than expected, slow release | Dry free bait less than hookbait unless durability is the goal |
| Birdfood bait | Cracking if too coarse, dry or under-bound | Use moderate airflow and avoid over-boiling the open texture |
| Tiger nut or nut-based bait | Soft centers, oiling-out, surface stickiness | Dry carefully and test after soaking before long storage |
For fat and oil balance in milk, nut and seed mixes, use How to Balance Fat in Boilies. For ingredient processing and particle-size decisions, use How to Process Carp Bait Ingredients.
Practical Test: Find the Best Boil and Dry Time
The best boil and dry time is the one that produces the right finished bait after drying and soaking.
Use this test when developing a new recipe or changing a major process.
| Step | Action | Reason |
|---|---|---|
| 1 | Make a small 250–500 g dry-mix test batch | Do not risk a large batch before testing |
| 2 | Roll one size, such as 16 mm or 20 mm | Size changes boil and drying behaviour |
| 3 | Split into boil-time groups | Shows what boiling actually changed |
| 4 | Dry groups separately for 12, 24 and 48 hours where useful | Shows how drying changes the same bait |
| 5 | Soak test at 1, 6, 12 and 24 hours | Shows the finished bait in water |
| 6 | Record hardness, cracking, leakage, softening and rig durability | Turns guessing into bait-development notes |
| 7 | Choose by job | Free bait, hookbait, short session and long session may need different versions |
For example, with a 16 mm bait, you might compare 45, 60, 75 and 90 seconds. Then dry each group equally and soak test them. If the 45-second bait is too soft after six hours and the 90-second bait is too hard and slow, the useful answer may be in the middle.
That is real bait development.
Common Boiling and Drying Mistakes
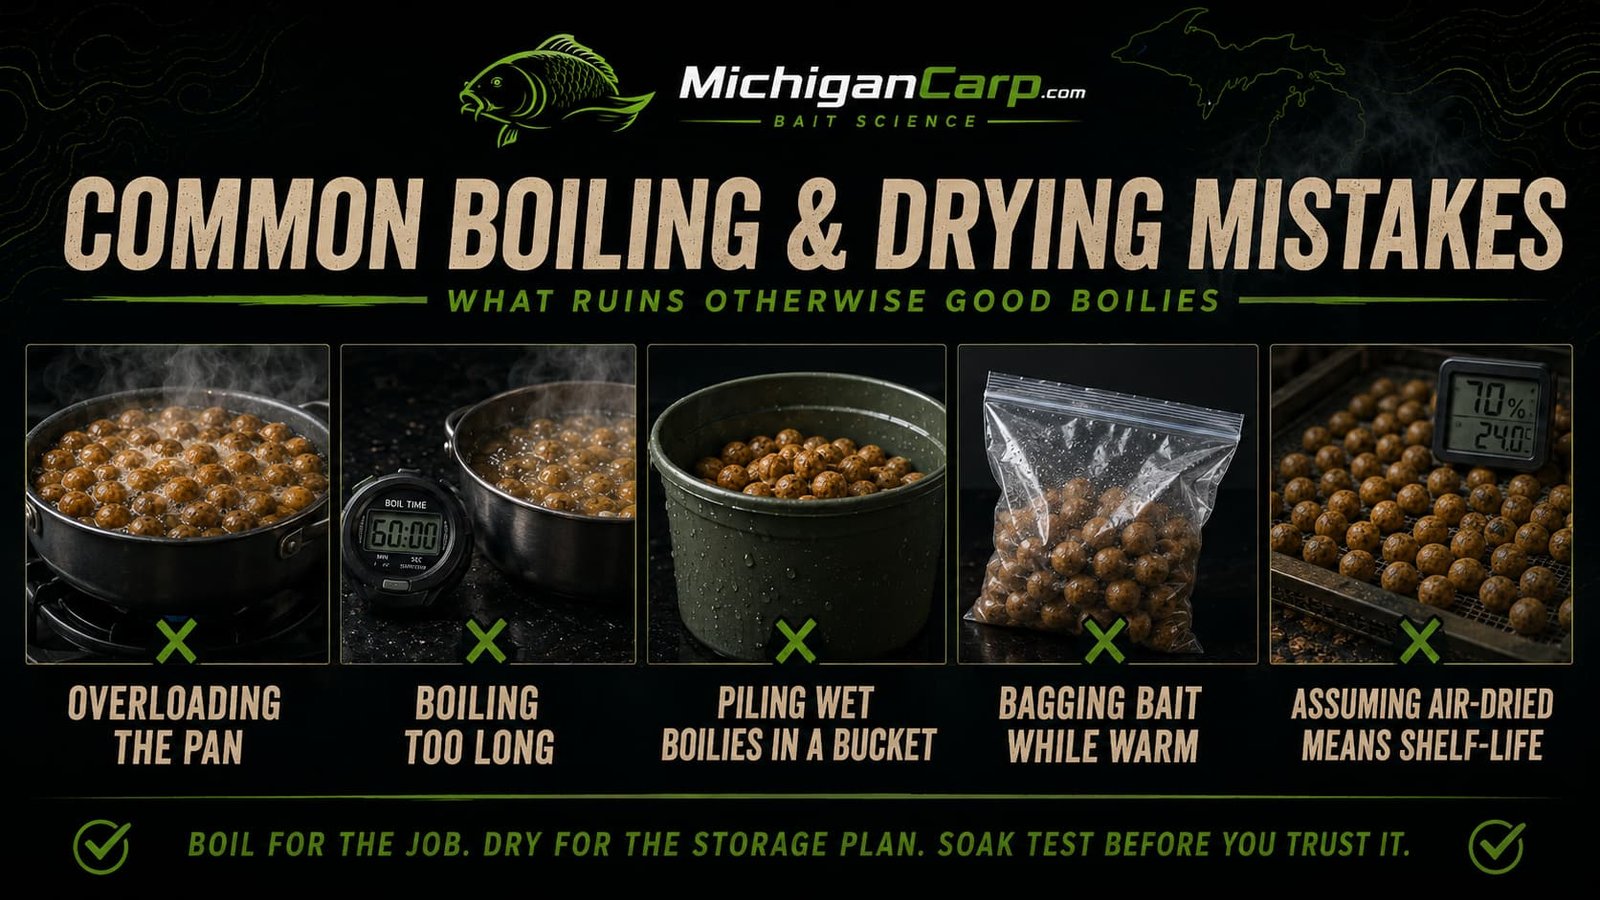
| Mistake | Why it causes problems | Better practice |
|---|---|---|
| Overloading the pan | Drops temperature and ruins timing | Boil smaller batches |
| Timing from drop-in inconsistently | Every batch gets a different true cook | Start timing when water returns to a rolling boil |
| Boiling too long | Can make free bait too hard, slow or rubbery | Boil for the bait’s job, then test |
| Boiling free bait like hookbait | Free bait may become too hard to feed well | Keep hookbait durability separate from freebait texture |
| Using dirty water too long | Coats bait and changes consistency | Change water when it becomes thick, stale or foamy |
| Piling wet boilies in a bucket | Traps steam and moisture | Drain and dry in a single layer |
| Bagging bait while warm | Creates sweating inside the bag | Cool and surface dry first |
| Drying too fast in heat | Can crack the surface while the center remains moist | Use clean airflow rather than harsh heat |
| Freezing too wet | Creates clumps and poor thawed texture | Dry before portioning and freezing |
| Assuming air-dried means shelf-life | Dry surface does not prove preservation | Use preservative logic, water-activity thinking and retained-sample testing |
| Not soak testing | You do not know how the bait behaves in water | Test before scaling up |
My Practical View
Boiling and drying are where homemade bait becomes real bait.
A recipe on paper does not catch carp. A paste does not catch carp. The finished bait catches carp, and the finished bait has to roll, boil, dry, soak and fish properly.
For my own bait making, I would rather start with a sensible boil and test the result than over-boil everything into hard marbles. Free bait should still be edible and active enough for the job. Hookbaits are different. They can be tougher, harder and dried longer because they have to survive the rig, cast, soak and nuisance attention.
Milk, nut and seed baits, casein baits, birdfood baits and tiger-nut or nut-heavy baits all need slightly different handling. That is why notes matter.
The best bait makers know which boil time worked, how long the bait dried, whether it cracked, whether it softened after 12 hours, whether the hookbait stayed on the rig and whether carp accepted it during real fishing.
Boil for the job. Dry for the storage plan. Soak test before you trust it.
FAQ
How long should I boil boilies?
It depends on size, recipe and use. As a starting point, 16 mm free baits can be boiled for 60–75 seconds after the water returns to a rolling boil, while 16 mm hookbaits may need 75–90 seconds. Larger baits usually need longer.
When should I start timing boilies?
Start timing once the water returns to a proper rolling boil after adding the boilies. This is more repeatable for home bait making than timing from the moment the bait enters the pan.
How long should I boil 20 mm boilies?
A practical starting point is 90–120 seconds for 20 mm free baits and 120–150 seconds for 20 mm hookbaits, then adjust by testing the finished bait after drying and soaking.
How long should I boil 24 mm boilies?
For 24 mm baits, a practical starting point is 120–150 seconds for free bait and 150–180 seconds for hookbaits. The correct time still depends on recipe, firmness target and soak testing.
Can you over-boil boilies?
Yes. Over-boiling can make bait too hard, rubbery, slow to leak or less useful as free bait. Longer boiling is not automatically better.
Can you under-boil boilies?
Yes. Under-boiled bait may split, stay soft, deform, fall off the hair or break down too quickly after soaking.
Should boilies float when they are done boiling?
Floating can happen because of trapped air, steam expansion, skin formation, density change or buoyant ingredients. Do not use floating as the only timing method.
Should I rinse boilies after boiling?
Usually no. For normal bait making, remove, drain and dry the boilies. Rinsing can wash away surface material and change drying.
How long should boilies dry before freezing?
Most freezer boilies should dry for 12–24 hours before freezing. Same-day bait may only need 2–6 hours if it will be used quickly, while harder freezer bait may benefit from 24–48 hours.
How long should hookbaits dry?
Hookbaits often need 24–72 hours of drying, followed by soak testing on the actual rig. Harder specialist hookbaits may need longer, but longer drying is not always better.
Should boilies be dried in the sun?
Avoid harsh direct sun unless you have tested the bait. Strong heat can crack the outside while the inside remains moist.
Can I dry boilies in a bucket?
No. Wet boilies should not be piled in a bucket. Use racks, mesh trays or air-dry bags so air can move around the bait.
Should I glug boilies straight after boiling?
Heavy glugging is usually better after the bait has cooled and surface dried. Wet hot bait can absorb unevenly, turn sticky, trap moisture or soften too much.
Are air-dried boilies shelf-life boilies?
Not automatically. Shelf-life bait requires proper formulation, preservation, drying, packaging, water-activity thinking and storage testing. Air drying alone does not prove shelf stability.
Why did my boilies crack?
Common causes include dry paste, too much hard binder, coarse ingredients, over-boiling, drying too fast, poor egg level or uneven drying.
Why did my boilies go soft after soaking?
Possible causes include under-boiling, weak binder, too much liquid or fat, too little drying, poor paste structure or a recipe that lacks enough set for the intended soak time.
Why are my boilies greasy?
Greasy boilies often contain too much oil, whole milk powder, cream powder, milk replacer, nut fat, oily liquid or high-fat ingredients without enough structure and drying control.
Should free baits and hookbaits be boiled the same?
No. Hookbaits usually need more durability. Free bait should be easier to eat, release properly and match the baiting situation.
Next Steps
- What Boiling Does to Carp Bait — understand heat, steaming, leakage and bait structure.
- Water Activity in Boilies — understand drying, storage and available water.
- How to Test Boilies Before Fishing — test water uptake, softening, cracking and rig durability.
- Potassium Sorbate, Sodium Benzoate and Citric Acid in Shelf-Life Boilies — understand the preservation system.
- How to Prepare Boilies for Carp Fishing — use glugs, soaks and hookbait conditioning properly.
- How to Make Wafters and Pop-Ups From a Boilie Base Mix — test buoyancy and balance after drying and soaking.
- How to Balance Fat in Boilies — avoid greasy, slow-drying bait problems.
- How to Process Carp Bait Ingredients — understand grinding, sieving, soaking, cooking and drying decisions.
- How to Formulate a Milk, Nut and Birdfood Boilie Base Mix — build the base bait before cooking and drying.
- Bait Science — browse the technical bait library.