

Learning how to boil and dry boilies properly is one of the most important practical skills in homemade carp bait making.
A good base mix can still become poor finished bait if it is cooked inconsistently, piled up while hot, dried without enough airflow, bagged while still sweating or trusted without a proper water test.
Boiling and drying are not simply finishing steps. Together they influence the bait’s outer skin, firmness, internal structure, durability, water uptake and how well it survives the job you made it for.
This article is deliberately practical. For the deeper heat-treatment science, including protein setting, starch gelatinization, steaming and leaching, use What Boiling Does to Carp Bait: Heat, Steaming, Leakage and Structure.
For judging whether the finished bait has reached the right drying condition, use How to Tell When Boilies Are Dry Enough.
For the final water and rig tests, use How to Test Boilies Before Fishing.
Boil for the job. Dry for the storage plan. Test the finished bait before you trust it.
Quick Start: Boiling and Drying Boilies
A repeatable home process is more valuable than chasing one supposedly perfect boil time.
| Stage | Practical approach | Why it matters |
|---|---|---|
| Roll | Keep bait diameter as consistent as possible | Different sizes cook at different rates |
| Water | Use plenty of vigorously boiling water | Helps the pan recover quickly |
| Batch size | Cook small, repeatable batches | Avoids large temperature drops |
| Timing | Use the same timing method every batch | Makes comparisons meaningful |
| Drain | Remove gently and allow surface water to escape | Prevents sweating and clumping |
| Dry | Spread in a single layer with clean airflow | Encourages even drying |
| Store | Match storage to the bait type | Freezer bait and shelf-life bait are different |
| Test | Soak a sample before scaling up | Shows what the bait actually does in water |
Do not judge a boilie only when it leaves the pan. Judge it after cooling, drying and soaking.
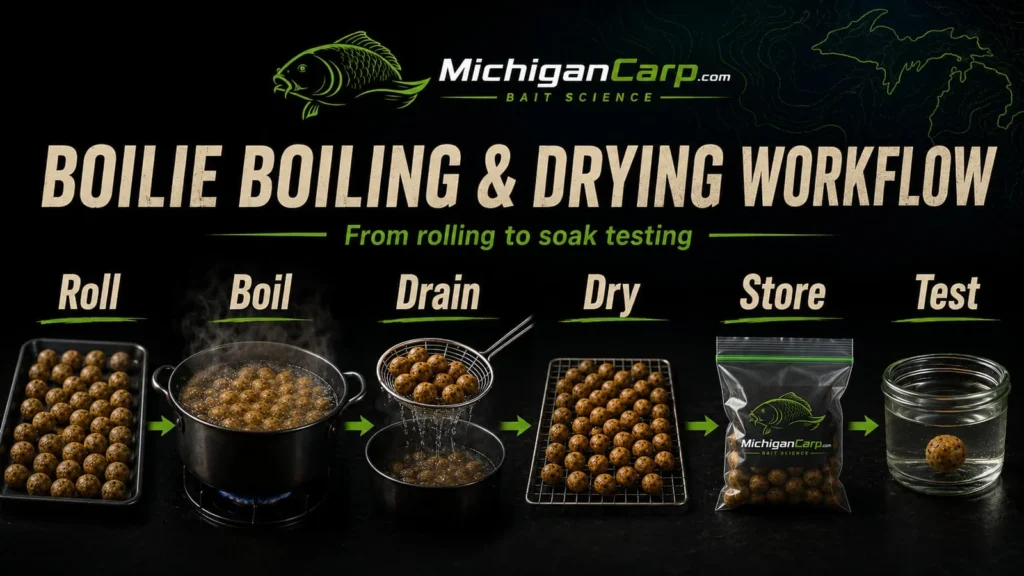
Table of Contents
Before You Boil: Get the Paste Right First
Boiling cannot rescue badly designed or badly mixed paste.
Before the bait enters the pan, the paste should roll cleanly, keep its sausage shape, cut evenly and produce boilies without serious cracking, tearing, slumping or sticking.
If the paste is wrong, fix the paste before trying to compensate with a longer boil.
Paste that is too sticky
Sticky paste may come from excess egg or other liquid, heavy syrups, too much glycerin or oil, insufficient resting, or too little dry structure.
Let the paste rest first. If it remains excessively sticky, make a measured correction with the original dry mix rather than randomly adding a new ingredient.
Paste that is too dry
Dry paste can split during rolling or boiling.
Possible causes include insufficient liquid, too much hard binder, coarse particles, poor mixing or paste being left uncovered while you roll.
Add liquid cautiously and allow the paste to rest before deciding it needs more.
Paste that is too soft
Soft paste is not automatically bad. Some food baits are deliberately soft.
The problem is paste that cannot survive rolling, cooking and the intended soak time.
Before increasing binders, check whether the formula contains excessive oil, syrup or other liquids.
For broader diagnosis, use Boilie Problems: Real Causes and Practical Fixes.
Equipment
For normal home bait making you need little more than:
- a large stockpot;
- spider strainer or slotted spoon;
- timer;
- drying racks or mesh trays;
- clean towels for brief draining;
- labels;
- freezer bags or containers; and
- a notebook or batch sheet.
The pot matters because the bait needs enough water to move freely and the water must recover quickly after each batch is added.
Four small consistent batches are better than one overloaded pan.
How Long Should You Boil Boilies?
There is no universal boil time that is correct for every boilie.
Diameter matters, but so do:
- base-mix composition;
- egg level;
- starch content;
- albumen and other binders;
- caseins and milk proteins;
- fat and oil;
- particle size;
- soluble ingredients;
- whether the bait is a free bait or hookbait; and
- the texture you actually want after soaking.
The following numbers are development starting points, not rules.
| Boilie size | Free-bait test window | Harder/hookbait test window |
|---|---|---|
| 10 mm | 20–30 sec | 30–45 sec |
| 12 mm | 30–45 sec | 45–60 sec |
| 14 mm | 45–60 sec | 60–75 sec |
| 16 mm | 60–75 sec | 75–90 sec |
| 18 mm | 60–90 sec | 90–120 sec |
| 20 mm | 75–120 sec | 120–150 sec |
| 24 mm | 90–150 sec | 120–180 sec |
Do not turn this table into a rulebook
A 24 mm boilie does not automatically need two and a half or three minutes.
For example, with my own established milk-and-nut bait, around 90 seconds has worked with 24 mm boilies. That is useful field experience with that particular mix, not evidence that every 24 mm bait should receive the same boil.
A dense, highly bound hookbait may need considerably longer. A more open free bait may be ready sooner.
The answer comes from controlled testing.
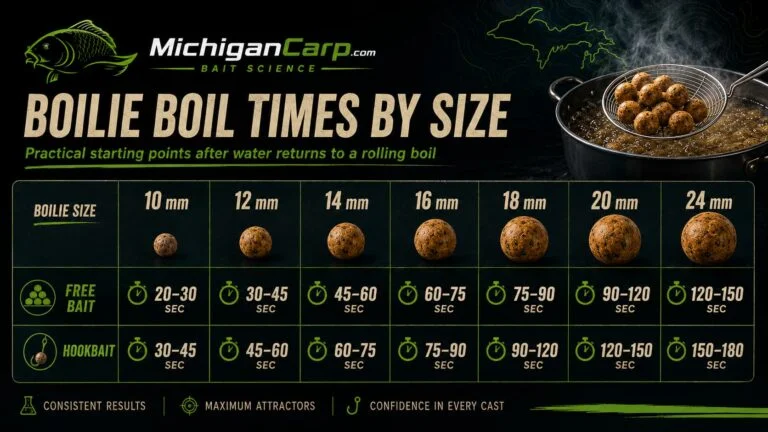
Alt text: Boilie boil time by size chart showing practical starting points for different boilie diameters, with free baits cooked less aggressively than durable hookbaits.
When should the timer start?
Whichever timing method you use, use it consistently.
For home bait making I prefer small batches and timing once the pan has returned to a steady rolling boil. That only works properly if water volume, batch size and stove setting are kept reasonably consistent.
If you prefer timing from the moment the boilies enter the water, that can also be used for comparative testing—just do not switch methods halfway through development.
The purpose is repeatability.
What Boiling Should—and Should Not—Do
Boiling should set the bait enough that it becomes practical fishing bait.
It can help form a usable outer skin, strengthen raw paste and create a structure capable of surviving handling, drying, casting and soaking.
It should not automatically turn every boilie into a hard marble.
Signs that the process needs adjustment
| Observation | Possible cause | What to test next |
|---|---|---|
| Bait collapses when lifted | Very soft paste or insufficient setting | Slightly longer cook and review paste structure |
| Bait splits badly | Dry paste, coarse particles, poor rolling or weak cohesion | Correct paste before extending boil time |
| Bait becomes rubbery | Excessive structural binders or aggressive cooking | Reduce cooking or review formula |
| Surface becomes excessively hard | Too much cooking and/or drying | Shorter cook or gentler drying |
| Bait floats in the pan | Air, steam, density change or buoyant ingredients | Do not use floating as the sole timer |
| Water becomes thick or foamy | Material accumulating from repeated batches | Replace cooking water |
The specialist article What Boiling Does to Carp Bait explains the underlying heat and structure changes in more detail.
Should boilies be rinsed after boiling?
Usually not.
For normal bait making, remove them, drain them and move them onto drying racks.
Rinsing can wash material from the surface and introduce another variable into the process.
Should you add salt to the boiling water?
Normally there is little reason to.
If salt or minerals are part of the bait design, measure them deliberately into the recipe or treatment rather than relying on an uncontrolled amount in the cooking water.
Draining and Cooling After Boiling
Freshly boiled bait is hot, wet and often comparatively fragile.
Do not pour it directly into a sealed bucket or plastic bag.
That traps steam and creates condensation.
A better sequence is:
- Remove the bait gently with a spider strainer or slotted spoon.
- Shake off loose water.
- Allow it to steam off briefly.
- Transfer it to mesh trays or racks.
- Separate touching boilies.
- Allow the bait to cool.
- Label the batch with boil time and recipe details.
Good draining makes controlled drying easier.
How to Dry Boilies Properly
Air drying means allowing moisture to leave the bait under controlled conditions.
For normal homemade boilies, the useful ingredients are simple:
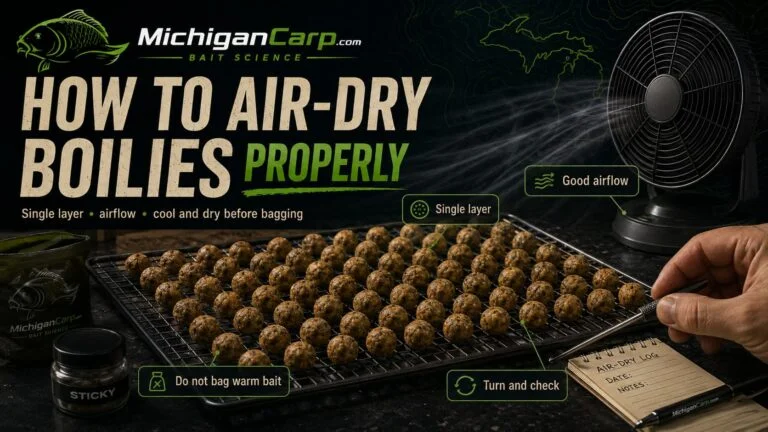
- clean airflow;
- a single layer of bait;
- cool to moderate conditions;
- no trapped steam;
- occasional turning or shaking; and
- enough time for the intended use.
Do not confuse drying with heating.
A fan can help move air in humid conditions. Blasting boilies with high heat may dry the surface rapidly while leaving the centre comparatively moist.
Good drying surfaces
Mesh trays and cooling racks work well because air can reach more of the bait.
Air-dry bags are useful after the initial wet stage, particularly for short-term toughening and transport.
Clean towels are useful for brief draining but are poor long-term drying surfaces once they become damp.
Buckets and sealed plastic bags are poor choices for warm or damp bait because they trap moisture.
For the practical checks that tell you whether bait is actually ready for freezing, fishing or further conditioning, use How to Tell When Boilies Are Dry Enough.
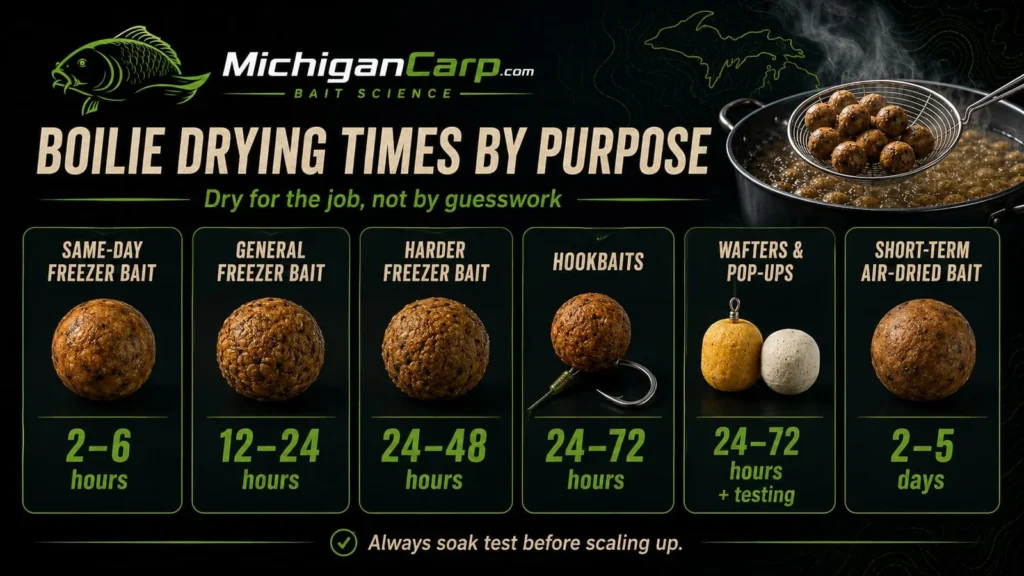
How Long Should Boilies Dry?
Time is only a starting point because drying rate changes with bait size, formulation, room temperature, humidity, fat content and airflow.
| Intended use | Practical starting range | Main objective |
|---|---|---|
| Same-day bait | 2–6 hours | Cool and lose obvious surface moisture |
| General freezer bait | 12–24 hours | Cool, surface dry and easy to package |
| Tougher freezer bait | 24–48 hours | Extra durability where genuinely needed |
| Hookbaits | 24–72 hours | Better casting, attachment and soak resistance |
| Wafters/pop-ups | 24–72 hours plus rig testing | Stable buoyancy after soaking |
| Short-term air-dried bait | 2–5 days | Tougher bait for travel/session use |
| Deliberate shelf-life bait | Formula and validation dependent | Cannot be determined by drying time alone |
A small 14 mm birdfood boilie can dry very differently from a dense 24 mm milk-and-nut bait.
Do not assume 24 hours is automatically correct because the clock says so.
Check the bait.
Freezer Bait, Hookbaits, Wafters and Pop-Ups Need Different Treatment
One of the easiest mistakes in boilie making is trying to make every finished bait equally hard.
They do not all have the same job.
Freezer bait
Freezer bait generally needs to be:
- cool;
- no longer steaming;
- reasonably surface dry;
- easy to separate and package; and
- capable of thawing without becoming a wet clump.
Portion it into useful session quantities before freezing.
Record the recipe, size, boil time, drying time and date.
Freezing is a storage method, not sterilization. For general food-science background, the USDA Food Safety and Inspection Service guide to freezing explains that freezing suppresses microbial growth rather than making food sterile.
For the complete bait-storage workflow, use How to Store Homemade Boilies.
Hookbaits
Hookbaits have a different job.
They may need to survive:
- a hard cast;
- bait screws or hair stops;
- nuisance fish;
- crayfish;
- repeated recasting; and
- overnight or longer immersion.
That can justify more cooking, more drying or a purpose-built hookbait formulation.
But do not automatically harden the whole free-bait batch simply because the hookbait needs greater durability.
Wafters and pop-ups
Drying can change buoyancy.
A wafter that balances correctly when freshly made may sink differently after 48 hours of drying or after absorbing liquid.
A pop-up may also lose lift during prolonged soaking.
Test wafters and pop-ups on the exact hook and rig that will be used.
The specialist formula work belongs in How to Make Wafters and Pop-Ups From a Boilie Base Mix, which is being kept separate from this article.
Glugging and Conditioning After Boiling
Do not heavily glug boilies while they are still hot and wet unless you have deliberately tested that process.
Hot damp bait can take up liquid unevenly, become sticky and complicate drying.
For most applications, allow the bait to cool and complete its initial drying stage first.
Light surface sprays are less disruptive than saturating warm boilies.
The detailed treatment process belongs in How to Prepare Boilies for Carp Fishing: Glugs, Soaks and Hookbait Conditioning.
Shelf-Life Warning: Dry Is Not Preserved
This distinction matters.
A dry-feeling boilie is not automatically a shelf-life boilie.
Drying removes moisture, but microbial stability depends on more than how hard the bait feels.
Water activity describes the water available for microbial growth and chemical reactions; it is not simply the same thing as total moisture content. The FDA technical guide to water activity in foods provides the general food-science background.
For normal home freezer bait, you do not need to turn every batch into a laboratory project.
If you deliberately want room-temperature shelf-life bait, however, you need a controlled preservation system, sensible drying, hygiene, packaging and retained-sample testing.
For MichiganCarp’s preservation framework, use Potassium Sorbate, Sodium Benzoate and Citric Acid in Shelf-Life Boilies.
For normal freezer and session storage, use How to Store Homemade Boilies.
Hard does not prove dry, and dry does not prove shelf-stable.
A Better Way to Find the Right Boil and Dry Time
Instead of asking, “What is the correct boil time?” ask:
Which process gives this particular bait the best finished performance for the job I need it to do?
Use a small development batch.
Simple controlled test
- Make 250–500 g of one base mix.
- Roll all bait to the same diameter.
- Divide it into several cooking groups.
- Change only the boil time.
- Dry all groups under the same conditions.
- Check them after 12, 24 and, where useful, 48 hours.
- Soak-test samples for the period you expect to fish them.
- Record softening, cracking, swelling, surface loss and attachment strength.
- Choose the version that fits the job.
For example, with a 16 mm bait you might compare 45, 60, 75 and 90 seconds.
If the 45-second bait becomes too weak after six hours while the 90-second bait becomes unnecessarily rubbery, you have learned something useful about that formulation.
That is better bait development than copying a universal timing chart.
For the full finished-bait testing system, use How to Test Boilies Before Fishing.
Common Boiling and Drying Mistakes
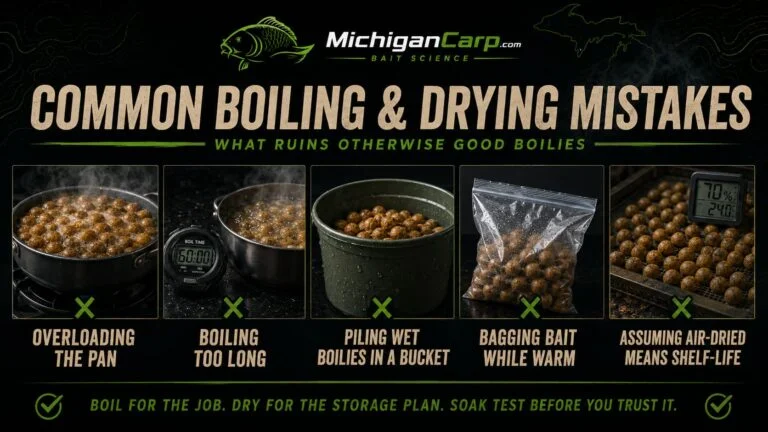
| Mistake | Why it causes trouble | Better practice |
|---|---|---|
| Overloading the pot | Water temperature collapses and batch timing changes | Cook smaller batches |
| Changing timing method | Makes test batches impossible to compare | Use one repeatable timing method |
| Over-boiling free bait | Can make bait excessively hard or rubbery | Cook for the intended job |
| Treating free bait like hookbait | Sacrifices food-bait texture for unnecessary durability | Separate free-bait and hookbait requirements |
| Leaving dirty water too long | Alters the cooking environment | Replace it when heavily contaminated |
| Piling hot wet bait in a bucket | Traps steam and moisture | Spread bait immediately |
| Bagging while warm | Encourages condensation | Cool and surface dry first |
| Drying with excessive heat | Can harden or crack the outside too quickly | Prefer airflow |
| Freezing wet clumps | Makes portioning and thawing poor | Surface dry before freezing |
| Assuming hard means dry | Surface texture can mislead | Cut, weigh, jar-test or soak-test |
| Assuming air-dried means shelf-life | Drying alone does not validate preservation | Use proper preservation and storage logic |
| Skipping soak tests | Hides failures until you are fishing | Test before making large batches |
Michigan Notes
Michigan conditions add another variable because spring and fall bait making can happen in cool, damp weather while midsummer conditions may be warm and humid.
A bait left for 24 hours in a dry heated room in winter is not equivalent to a bait left for 24 hours in humid October air.
That is why I prefer judging the condition of the bait, not simply counting hours.
For my own larger boilies, particularly 24 mm baits, I also avoid assuming that a bigger diameter automatically means an extremely long boil. My established milk-and-nut bait has performed well when 24 mm boilies were cooked for around 90 seconds and then dried and tested properly.
That does not make 90 seconds a universal recipe. It shows why your own batch records matter more than a generic chart.
For multi-day Michigan sessions, I generally want free bait firm enough to handle transport, baiting and immersion without turning it into a hard low-response marble. Hookbaits can be considerably tougher because they have a different job.
My Practical View
The finished boilie matters more than the theoretical recipe.
A recipe on paper does not catch carp.
The bait that goes into the lake has to survive mixing, rolling, cooking, drying, storage, casting and immersion while still behaving like the food bait you intended to make.
That is why I would rather begin with a sensible cooking process and test the result than automatically boil everything harder and longer.
Free bait should normally remain a food bait.
Hookbaits can be engineered for greater durability.
And every significant change in formulation should be followed by another boil, dry and soak test.
The aim is not to produce the hardest boilie. The aim is to produce the right boilie for the job.
FAQ
How long should I boil boilies?
There is no universal time. Diameter provides a starting point, but formulation and intended use matter just as much. Use a test window, dry the bait and then judge it after soaking.
How long should I boil 16 mm boilies?
Around 60–75 seconds is a reasonable development window for many 16 mm free baits, with tougher hookbaits often tested slightly longer. Treat that as a starting point rather than a rule.
How long should I boil 20 mm boilies?
A useful starting test range is roughly 75–120 seconds for free bait and longer where extra hookbait durability is needed. The finished soak test should decide the final process.
How long should I boil 24 mm boilies?
Start by testing rather than assuming a fixed time. Roughly 90–150 seconds covers a useful free-bait development window for many formulations. My own established 24 mm milk-and-nut bait has worked at around 90 seconds, but other formulations may need longer.
Should I wait for boilies to float before removing them?
No. Floating can result from trapped air, steam, density changes or ingredients in the formula. It is not a reliable universal timer.
Can boilies be over-boiled?
Yes. Excessive cooking can create unnecessarily hard, rubbery or tightly set free bait. More cooking is not automatically better.
How long should boilies dry before freezing?
For many homemade freezer baits, 12–24 hours is a useful starting range, but bait condition matters more than the clock. The bait should be cool, no longer steaming and sufficiently surface dry for clean packaging.
Can I freeze boilies the same day I make them?
Yes, if they have cooled and lost enough surface moisture for clean packaging. For ordinary planned freezer bait, allowing more drying time often gives easier handling and more predictable thawing.
How long should hookbaits dry?
Twenty-four to seventy-two hours is a useful development range for many hookbaits, followed by a soak test. Specialist hard hookbaits may need more, but longer is not automatically better.
Should I dry boilies in direct sun?
Avoid harsh direct heat unless you have specifically tested the bait that way. Fast surface drying can produce cracking or uneven moisture loss.
Can I dry boilies in a bucket?
Not while they are warm and wet. Use trays or mesh so air can circulate. Buckets become useful only after the bait has reached the appropriate condition for storage or transport.
Should I glug boilies immediately after boiling?
Usually not heavily. Let the bait cool and complete its initial drying first, then condition it in a controlled way.
Are air-dried boilies automatically shelf-life boilies?
No. Air drying alone does not validate room-temperature shelf stability. Deliberate shelf-life bait needs a proper preservation and storage system.
Why do my boilies crack?
Common causes include dry paste, oversized coarse particles, insufficient liquid, excessive hard binder, aggressive cooking and drying too quickly.
Why do boilies become soft after soaking?
Possible causes include inadequate structure, insufficient cooking for that formula, insufficient drying, excessive liquid or fat, or simply a bait designed to break down faster than the intended fishing period.
Should free baits and hookbaits be boiled the same way?
Not necessarily. Hookbaits often need greater durability. Free bait should normally be judged primarily as food bait rather than being hardened simply to survive for the maximum possible time.
Next Steps
- What Boiling Does to Carp Bait: Heat, Steaming, Leakage and Structure — understand what heat treatment does inside the bait.
- How to Tell When Boilies Are Dry Enough — use practical checks instead of drying by the clock alone.
- How to Test Boilies Before Fishing — test soaking, cracking, softening and attachment strength.
- How to Store Homemade Boilies — manage freezer bait, session bait and hookbait storage.
- Potassium Sorbate, Sodium Benzoate and Citric Acid in Shelf-Life Boilies — understand the deliberate preservation system.
- How to Prepare Boilies for Carp Fishing: Glugs, Soaks and Hookbait Conditioning — treat finished bait without confusing conditioning with cooking or drying.
- How to Make Wafters and Pop-Ups From a Boilie Base Mix — specialist buoyant-hookbait formulation; keep unlinked until published.
- How to Formulate a Milk, Nut and Birdfood Boilie Base Mix — build the formulation before worrying about cooking.
- Bait Science — return to the technical bait library.