
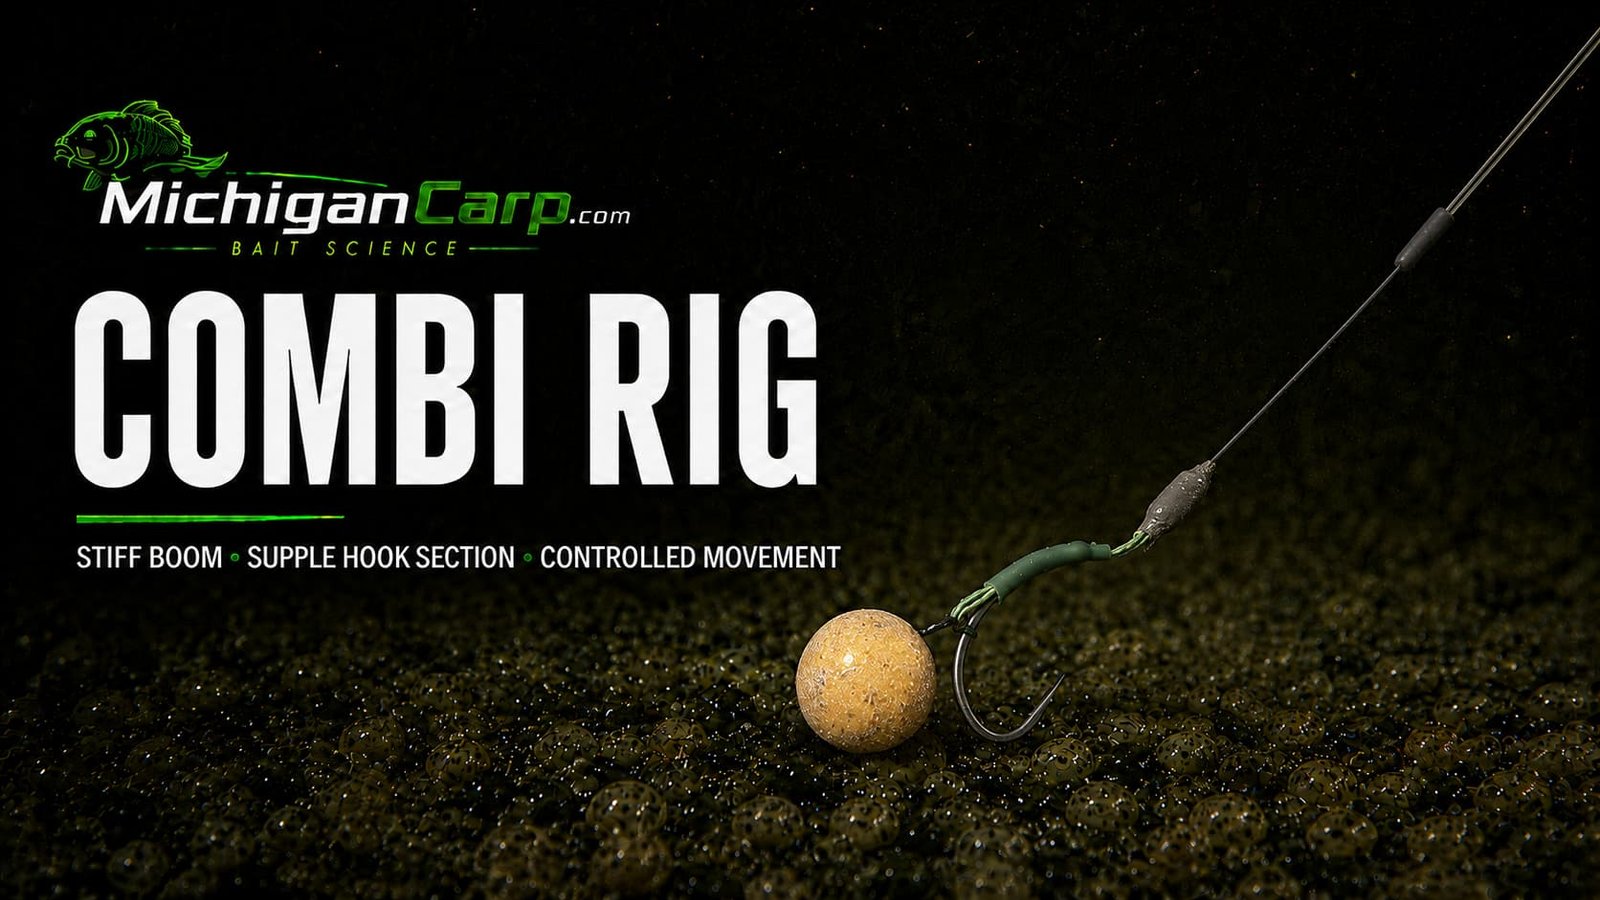
The Combi Rig for carp fishing combines two different hooklink behaviours in one presentation. A stiff mono or fluorocarbon boom helps the rig kick away from the lead and resist tangles, while a short supple braid section gives the hook and hookbait room to move. The concept is simple; the quality of the join and the length of the soft section determine whether it works as intended.
This Combi Rig guide concentrates on the classic two-material Combi Hair Rig joined with an Albright knot. That creates a clear, repeatable starting point for bottom baits, wafters and carefully balanced hookbaits. Coated-braid, crimped loop-to-loop, Combi Multi and reverse-combi versions are useful, but they are separate builds and should not be mixed into the core instructions.
Quick Answer
For a dependable Combi Rig, start with a 5- to 7-inch stiff boom of 20- to 25-pound mono or fluorocarbon and a 1.5- to 3-inch supple braid hook section. Tie the hook section as a standard Hair Rig, then join the braid to the boom with a carefully bedded Albright knot. As a starting method, pass the braid through a loop in the stiff material, wrap it 6 to 8 turns up the doubled stiff section and 4 turns back, then return the braid tag through the loop beside the standing braid so both braid sections leave the loop on the same side. Moisten, tighten slowly, pull-test hard and trim only after the knot has locked. Add putty over or immediately behind the join only after the knot passes the test. Finish the complete rig at roughly 7 to 10 inches, water-test the hookbait and make sure the stiff boom lies straight rather than bridging above the bottom.
Table of Contents
Combi Rig Quick Start
| Part | Dependable starting point | What to check |
|---|---|---|
| Hook | Strong size 4 or 6 wide-gape or curved pattern | Sharp point, open gape and an eye that suits the hooklink |
| Stiff boom | 5 to 7 inches of 20- to 25-pound stiff mono or fluorocarbon | Straight, uncreased and compatible with the joining knot |
| Supple section | 1.5 to 3 inches of 15- to 20-pound soft braid | Short enough to resist tangles, long enough for free movement |
| Join | Carefully tied Albright knot | Neat coils, no crossover, no slipping under a hard pull |
| Hookbait | Balanced bottom bait or wafter | Leaves the hook point and gape exposed |
| Hair | Set around the chosen hookbait | Bait moves without masking the hook |
| Finished length | About 7 to 10 inches | Matched to lead penetration and the actual lakebed |
| Putty | Small amount over or just behind the join | Optional for pinning and balance; never used to rescue a weak knot |
| Lead system | Compatible lead clip or inline arrangement on known clean ground | Hooklink, leader and lead-release system work safely together |
These Combi Rig figures are starting points, not rules. Material diameter, memory, coating, hook pattern, bait buoyancy and lead arrangement change the way the rig lands. Build around the actual components you will fish, then test the finished presentation in water and over a representative patch of bottom.
What Is a Combi Rig?
A Combi Rig is a hooklink that uses two levels of stiffness. In the classic version, most of the hooklink is a stiff mono or fluorocarbon boom. A much shorter section of supple braid carries the hook and hair. The two materials are joined close enough to the hook to control the soft section without removing its freedom of movement.
The stiff boom helps the hookbait land away from the lead, reduces the chance of the hook section wrapping around the leader and makes it harder for the complete hooklink to collapse into a loose heap. The braid allows the hookbait to behave more naturally and gives the hook room to turn when a carp takes the bait.
“Combi” describes the change in material behaviour, not one compulsory hook or bait attachment. A standard hair, blowback ring, Slip D-style loop or quick-change Multi arrangement can all be built onto a combined boom-and-braid concept. Each changes the mechanics, however, so this article uses a simple Hair Rig hook section as the reference build. Read the MichiganCarp rig guide before choosing the hook section in isolation.
Why the Combi Rig Works
In a Combi Rig, the two sections divide the work. The boom controls delivery and separation; the braid controls movement close to the hook. When those sections are balanced, the rig can cast more cleanly than a fully supple hooklink while behaving less rigidly around the bait than a hooklink made entirely from stiff material.
- Separation: the boom helps push the hookbait away from the lead as the rig settles.
- Tangle resistance: most of the hooklink cannot fold around the leader as easily as soft braid.
- Hook freedom: the short braid section allows the hook to move and turn independently of the boom.
- Lakebed control: the join gives a clear point from which the hook section can be shortened or lengthened.
- Versatile hookbaits: bottom baits, wafters, snowmen and restrained low pop-ups can be balanced on the same basic concept.
The advantages disappear when the braid is too long, the boom is kinked or the join floats above the bottom. A stiff section can also bridge over stones, shells, twigs or depressions instead of following the lakebed. The Combi Rig is therefore not automatically superior to a simple Hair Rig. Use it when the change in stiffness solves a real presentation problem.
Classic Combi Rig and Other Versions
Classic Two-Material Combi Hair Rig
The classic Combi Rig in this article uses a stiff mono or fluorocarbon boom joined directly to a single supple-braid hook section with an Albright knot. The braid continues into a knotless-knot Hair Rig. It is compact, has no detachable hook section and makes the material transition easy to inspect.
One-Material Coated-Braid Combi
A coated-braid Combi Rig can create the same stiff-to-supple effect without joining two materials. Leave the coating intact through most of the hooklink and strip a short section near the hook. This is the easiest version to tie and removes the Albright knot, although the coated boom is usually less rigid than a dedicated stiff mono. It is often the better starting point for anglers who cannot yet tie and test a two-material join consistently.
Crimped Loop-to-Loop Combi
A loop-to-loop Combi Rig can be dependable when it is a complete, designed system: a boom material approved for crimping, the correct crimp size, the proper crimping tool and a purpose-tied braided hook section. It is not a license to tie any two casual loops and cover them with putty. Pull-test the crimp and both loops independently before connecting them. Never crimp ordinary line simply because it is stiff.
Combi Multi Rig
The Combi Multi uses a short doubled braid loop joined to a stiff boom, allowing the hook to be attached Multi Rig style. It gives quick hook changes and a movable D, but its hook section, kicker and joining measurements differ from this classic Hair Rig build. Use the dedicated Multi Rig Guide to understand the loop-through-the-eye connection before attempting the combined version.
Reverse Combi Rig
A reverse combi places the stiffer material at the hook end and the supple material toward the lead. It remains a Combi Rig because two stiffnesses are combined, but it creates a different presentation often associated with stiff hook sections or special lead arrangements. It does not perform the same job as a stiff boom with a soft hook end and should be treated as a separate rig rather than a minor variation in the tying steps.
Combi Rig Components and Material Choices
Stiff Boom Material
For the classic Combi Rig, use a hooklink-grade stiff mono or fluorocarbon that knots cleanly and straightens without hidden damage. A breaking strain around 20 to 25 pounds is a practical starting point for open-water carp fishing, but diameter and abrasion resistance matter as much as the printed number. Increase strength for weed, shells, rocks, current or heavy fish only when the hook, knots and rest of the tackle remain compatible.
The boom should recover straight after being drawn between the fingers or over controlled steam according to the manufacturer’s directions. Reject any section with a white stress mark, flattened area or permanent crease. Stiff material can look strong while a sharp bend has already weakened it.
Supple Braid
A soft, round braid of roughly 15 to 20 pounds suits many classic Combi Rig hook sections. It needs enough body to form stable Albright coils without cutting into the stiff material, yet enough flexibility to let the hook and bait move. Very thin braid can bite into softer mono or make the knot difficult to inspect. Very thick braid creates a bulky join and may overpower a small hook eye.
Hook
On a Combi Rig, a strong size 4 or 6 wide-gape or curved hook is a sensible all-round choice. Size 2 or 4 may suit larger 20- to 24-millimeter hookbaits, heavy tackle and demanding water, but hook size should be chosen around gape, wire strength and bait size rather than a number alone. Keep the point completely exposed and inspect it after every cast. The carp-hook guide explains eyes, gapes, points and wire patterns in detail.
Hair and Hookbait Attachment
A standard hair is the most direct match for this Combi Rig tutorial. Set its length with the actual hookbait so the bait clears the bend and does not close the gape. A small separation behind the bend is a useful starting point, but buoyancy and bait shape affect the final position. A blowback ring can be used when you understand that arrangement; see the Blowback Rig guide.
Albright Knot
On this Combi Rig, the Albright is the load-bearing transition between the soft and stiff materials. Its braid coils grip a doubled section of mono or fluorocarbon. The knot is compact enough to cover with putty, but its small size is not permission to tie it casually. The direction of the returning tag, the neatness of the coils and the final pull test are essential.
Anti-Tangle Sleeve and Lead-End Connection
An anti-tangle sleeve can help the boom leave a quick-change swivel cleanly. Tie a figure-eight loop when using a compatible quick-change connection. Crimp only a boom specifically approved for crimping, using the manufacturer’s matched crimp and tool. Whatever method is chosen, pull-test it before sliding the sleeve into place. The terminal-tackle guide covers the connection as part of the complete end tackle.
Tungsten Putty
A small amount of putty over or immediately behind the Albright can pin the join, smooth the transition and counterbalance a buoyant hookbait. The knot must be secure before putty is applied. Putty is not glue, reinforcement or proof that a slipping knot is safe. Remove it during later inspections when necessary so the coils and material beneath remain visible.
How to Tie a Combi Rig Step by Step
- Choose compatible materials. Start with 20- to 25-pound stiff mono or fluorocarbon and 15- to 20-pound supple braid. Tie a sample Albright and test it before building the fishing rig.
- Cut the supple hook section. Take roughly 8 to 10 inches of braid. The extra material makes the hair, knotless knot and Albright easier to handle; the finished soft section will be much shorter.
- Tie the hair loop. Make a small overhand bait loop at one end of the braid. Tighten it fully and trim the tag without cutting into the knot.
- Set the hair. Use the intended hookbait as a gauge. Position it so the finished bait can move clear of the hook bend without masking the point or closing the gape.
- Tie the hook. Form a neat knotless knot with the hair running along the back of the shank. Make consistent wraps toward the bend and pass the braid back through the eye in the direction required for the hooklink to leave cleanly toward the point side. Pull-test the hook knot.
- Set the supple-section length. Measure 1.5 to 3 inches from the hook eye to the intended material join. Leave several extra inches of braid tag for tying the Albright.
- Prepare the boom. Cut 8 to 10 inches of stiff material so there is room for the joining knot and lead-end connection. Form a smooth open loop in the hook-end of the boom; do not crease it sharply.
- Start the Albright. Pass the braid tag through the loop in the stiff material. Hold the braid along both legs of the doubled boom.
- Make the locking wraps. Wrap the braid 6 to 8 times up the doubled stiff material, keeping each coil beside the previous one. Then make 4 wraps back toward the loop.
- Return the tag correctly. Pass the braid tag back through the stiff-material loop beside the standing braid, so both braid sections leave the loop on the same side. This is essential for the knot to dress and lock correctly.
- Bed the join. Moisten the knot and tighten it slowly while guiding the braid coils together. Pull first by hand, then apply firm pressure with safe rig pullers. Stop and retie if a coil crosses, the braid cuts into the boom, or the knot creeps.
- Trim and finish the join. Only after the knot passes the pull test should the tags be trimmed. Leave safe, tidy ends rather than cutting flush into a loaded knot. Add a small amount of putty over or immediately behind the join when the presentation needs it.
- Finish the lead end. Slide on an anti-tangle sleeve when required and tie a figure-eight loop, or use a manufacturer-approved crimping system. Pull-test this connection separately.
- Straighten and measure. The complete rig should normally finish around 7 to 10 inches, with a straight boom and a clearly shorter supple hook section.
- Test the complete presentation. Mount the hookbait, lower the rig into water and watch it settle several times. Check the bait balance, hook exposure, material transition, boom contact and the way the supple section recovers after being disturbed.
Do not fish the Combi Rig because the knot looks small or the boom appears straight in your hand. The useful checks are whether both connections hold under pressure and whether the complete hooklink settles correctly on a representative lakebed.
How to Tie and Test the Albright Knot
The Combi Rig Albright knot works because the braid grips two parallel legs of the stiff material. Six to eight turns up and four back down are a practical starting range, not a universal formula. Slick braid, hard fluorocarbon and large diameter differences may need adjustment. The correct number is the one that produces compact, non-crossed coils and remains locked when tested with the exact materials.
If you have not tied this connection before, watch Gardner Tackle’s Albright Knot video tutorial before building the rig. It shows the braid and stiff material being joined visually, which is easier to follow than written instructions alone. Practise with spare material first and pull-test every completed knot—the tutorial provides the tying sequence, but the finished connection must still be tested with your exact braid and boom material.
- The stiff-material loop stays rounded during tying rather than being crushed into a sharp fold.
- Every braid wrap lies beside the previous wrap instead of crossing it.
- The return wraps travel back toward the loop under control.
- The braid tag returns through the loop beside the standing braid, with both braid sections leaving on the same side.
- The knot is moistened and tightened progressively, not shocked tight while dry.
- The completed knot does not slide, click, cut or change shape under a hard sustained pull.
Test the knot with rig pullers, not bare braid wrapped around fingers. Apply pressure in stages, relax it, then pull again while watching the coils. A knot that moves once should be cut off and retied. Do not add glue to compensate for poor materials or tying. After every fish and any contact with mussels, rocks or snags, remove the putty when necessary and inspect the join again.
Boom and Supple-Section Lengths
| Situation | Stiff boom | Supple section | Adjustment to test |
|---|---|---|---|
| Clean gravel, sand or clay | 5 to 6 inches | 1.5 to 2 inches | Compact setup with firm kick-away |
| Firm silt or minor debris | 6 to 7 inches | 2 to 3 inches | More freedom near the hook without losing control |
| Light, low weed | 6 to 8 inches | 2.5 to 3.5 inches | Use soluble foam and confirm the hook section settles above strands |
| Longer-range casting | 6 to 8 inches | 1.5 to 2.5 inches | Keep the soft section controlled and feather the cast |
| Very soft or unknown bottom | Do not guess | Do not simply lengthen | Investigate the bottom and reconsider the complete rig and lead system |
The Combi Rig soft section should be long enough for the hook to react but not so long that it wraps around the boom or folds beneath the bait. The stiff section should create separation without holding the join off the bottom. If the lakebed is uneven, a semi-stiff coated braid may follow it better than very rigid fluorocarbon.
Measure after every knot is tied. A nominal 8-inch rig can finish shorter once the hair, hook knot, Albright and lead-end loop consume material. Record the finished measurements of a version that repeatedly casts and settles well so it can be reproduced.
Bottom Baits, Wafters and Pop-Ups
Wafters and Balanced Bottom Baits
A wafter or balanced bottom bait is the most straightforward match for the classic Combi Rig. The bait should reduce the apparent weight of the hook without lifting the hook section into an unstable position. Test every hookbait in water because buoyancy changes with bait size, drying, drilling, liquid absorption and the weight of the hook.
Use enough separation on the hair for the bait to clear the bend, but keep the rig compact. A large buoyant bait pulling against a very short soft section can lift the join or make the hook sit awkwardly. Compare other balanced-bait options in the bottom-bait rig guide.
Standard Bottom Baits
A normal sinking boilie, tiger nut, maize combination or other appropriate hookbait can be presented on the hair. Make sure the bait is not so heavy that it drags the supple braid into a tight angle against the boom. On clean ground, a simpler Hair Rig may perform the same job with fewer variables; the Combi Rig earns its place when tangle resistance and controlled separation are useful.
Snowman Hookbaits
A snowman can balance a bottom bait with a smaller buoyant topper. Check that the combined bait does not mask the point, close the gape or twist around the soft section. The extra bait length may require a longer hair but does not automatically require a longer braid section. See the Snowman Rig guide.
Low Pop-Ups
A restrained low pop-up can be counterbalanced at the Albright join so the hook sits just above light debris. This requires careful buoyancy control and repeated water tests. When a dedicated low pop-up is the primary objective, the Ronnie Rig for Carp Fishing or another presentation in the pop-up rig guide may be more direct.
Matching the Combi Rig to Lakebeds and Lead Systems
Clean Gravel, Sand and Clay
These are the easiest conditions for the classic version. The boom can lie straight, the join remains visible during a margin test and a shorter braid section stays controlled. Use only as much rigidity as the cast requires. On flat clean ground, an excessively stiff boom can make the bait behave less naturally without providing an additional benefit.
Firm Silt
Firm silt can suit a slightly longer hooklink and a 2- to 3-inch supple section. The key question is how far the lead enters the bottom. If the lead plugs in while the boom remains short and rigid, it can pull the hookbait toward the crater or hold the join above the silt. Adjust lead shape, weight, hooklink length and lead arrangement together.
Light Weed and Scattered Debris
A small soluble-foam nugget around the hook can protect the point and slow the hook section as it lands. A slightly longer supple section may settle around short strands, but too much braid creates new tangle risk. When weed or debris becomes dense, use the silt, weed and chod-style rig guide rather than assuming a longer Combi Rig will solve it.
Lead Clip, Inline and Helicopter Arrangements
A lead clip or inline lead can work on clean, known ground when the hooklink leaves the connection cleanly and the complete leader system is safe. A helicopter-style arrangement may help over softer bottom, but a stiff hooklink can rotate around the leader during flight and must be tested for tangles. Choose the lead system according to lakebed, weed, casting load and fish safety, not the name of the hooklink. Use the lead clip, inline and helicopter guide.
Casting, Tangling and Resetting
A straight Combi Rig boom is not automatically tangle-free. The hook can still catch the leader, the braid can wrap around the join and a long hair can circle the hook. The transition point must remain compact, and the soft section should be only as long as the presentation requires.
- Use an anti-tangle sleeve: it helps the boom leave the swivel cleanly.
- Keep the supple section controlled: extra braid is the most common source of wraps.
- Feather the cast: slowing the lead before impact helps the hooklink straighten.
- Use soluble foam: a small piece can protect the point and delay the hook section as it lands.
- Add a small PVA stringer or mesh stick: it can separate the hook from the boom and place a few baits around the hookbait. See the PVA fishing guide.
- Check every retrieve: inspect the Albright, boom, braid, hair and hook point before recasting.
The rig may straighten again after minor disturbance, but no hooklink resets perfectly in every situation. Crayfish, small fish, weed, sticks and a buried lead can move it into a poor position. Recast after unexplained indications or whenever the presentation may have been compromised.
Combi Rig Compared With Other Carp Rigs
| Rig | Main distinction | Choose it when |
|---|---|---|
| Classic Combi Hair Rig | Stiff boom joined to a short single-braid hook section | You want kick-away control with a natural hair presentation |
| Coated-braid combi | One material with a short stripped section | You want the simplest stiff-to-supple effect without a joining knot |
| Combi Multi Rig | Doubled braid loop allows quick hook changes | You understand the Multi connection and need a replaceable hook |
| Hair Rig | One continuous supple or coated hooklink | The bottom is clean and simplicity is the priority |
| Slipped D Rig | Mobile D-style bait attachment close to the hook | You want a moving bait swivel for wafters or balanced hookbaits |
| Ronnie Rig | Hook rotates on a spinner swivel above a separate boom | You want a controlled low pop-up presentation |
Combi Rig vs Hair Rig
The Hair Rig is easier to tie, has fewer failure points and follows uneven bottom more readily when made from supple material. The Combi Rig adds a stiff boom for separation and casting control. Use the Combi when the boom’s job is necessary; use the simpler Hair Rig when the bottom and range do not demand it.
Combi Rig vs Coated Braid
Coated braid gives an instant combi effect and is easier to retie on the bank. A dedicated stiff boom can be straighter, more resistant to collapse and more precise over known clean ground. The tradeoff is a separate load-bearing join that must be tied and inspected properly.
Combi Rig vs Slipped D Rig
The classic Combi Hair Rig fixes the bait to a hair; the Slipped D places a swivel or screw on a mobile D behind the hook. A Slipped D can itself be combined with a stiff boom, but that becomes another Combi variation. Use the Slipped D Rig guide for the correct loop and hook construction.
Common Combi Rig Mistakes
Using an Undefined Loop-to-Loop Join
Two loops are not automatically a safe connection. A crimped boom loop, braided hook-section loop and the way they interlock must each be designed and tested. For the classic rig, use a direct Albright rather than hiding an improvised loop-to-loop join under putty.
Making the Supple Section Too Long
A long braid section can wrap around the hook, fold beneath the bait and remove the boom’s control. Start short on clean ground and add length only when the lakebed requires more freedom.
Leaving the Join Floating
Fluorocarbon may sink, but bait buoyancy, trapped air, debris and boom shape can still hold the transition above the bottom. Water-test the complete rig. Add only enough putty to pin or balance the join after the knot has passed its strength test.
Using Putty to Hide a Bad Knot
Putty can conceal crossed coils, a cut boom or a slipping Albright. Inspect and pull-test first. If the knot changes under pressure, retie it; do not cover it.
Crimping the Wrong Material
Some stiff booms are designed for matched crimps and tools. Others are not. An incorrect crimp can cut, flatten or slip on the material. Follow the boom manufacturer’s instructions and test every finished crimp.
Fishing a Kinked Boom
A permanent bend changes the way the rig kicks away and may weaken the material. Replace the boom after a severe tangle, fish, snag or sharp fold. Straightening cannot repair structural damage.
Choosing the Rig Before Reading the Bottom
The stiff boom can bridge above deep silt or heavy debris. Find out what the lead and hooklink are landing on. Change the complete presentation when the lakebed is unsuitable rather than merely lengthening the soft section.
Ignoring Hook Sharpness
A perfect Albright cannot compensate for a dull or damaged hook. Check the point before every cast and after every fish. Change it whenever it is turned, flattened, rusted or uncertain.
A Practical Combi Rig Setup for Michigan Carp
For a Michigan public lake with clean gravel patches, firm silt and scattered low weed, start with a strong size 4 or 6 wide-gape hook, 15- to 20-pound soft braid and a 20- to 25-pound stiff mono or fluorocarbon boom. Use about 2 inches of braid between the hook eye and Albright, 6 inches of boom and a finished hooklink near 8 inches.
Mount a wafter or balanced bottom bait on a standard hair. Mould a small amount of putty over the tested Albright only if it helps the join settle. Connect the boom to a compatible lead clip or inline arrangement on known clean ground. Add a small soluble-foam nugget when light weed or shell fragments could catch the hook point.
Before casting, complete this margin test:
- pull both the Albright and lead-end connection firmly;
- confirm the boom is straight and undamaged;
- drop the rig beside the bank and watch it kick away;
- check that the join, boom and hookbait settle rather than hover;
- move the hookbait gently and watch the hook section recover;
- confirm the hook point and gape remain exposed;
- repeat the test after changing the hookbait or putty.
Shorten or lengthen only one section at a time so the effect can be seen. If the boom repeatedly sits above contours, switch to a less rigid material or another rig family from the rig starter guide. Consistent presentation matters more than preserving the name of the rig.
Frequently Asked Questions
What is a Combi Rig best used for?
It is best used when you want a stiff boom for separation and tangle resistance but still need a short, freely moving hook section. Clean bottoms, firm silt and low sparse weed are practical starting conditions.
How long should a Combi Rig be?
Seven to 10 inches is a useful general range. A 5- to 7-inch stiff boom and 1.5- to 3-inch supple section cover many clean or lightly silty situations. Adjust from the finished measurements after both knots are tied.
How long should the supple braid section be?
Start around 1.5 to 2 inches on clean hard ground and 2 to 3 inches over firm silt or minor debris. Make it longer only when a tested lakebed requires more movement. Excess braid increases tangles.
Which knot joins braid to fluorocarbon on a Combi Rig?
The Albright knot is a proven compact join for a supple braid and stiff mono or fluorocarbon. The braid wraps around a doubled section of stiff material. It must be moistened, bedded slowly and pull-tested with the actual materials.
Can I use a loop-to-loop connection?
Yes, when it is a designed connection using a correctly crimped loop in crimp-compatible boom material and a properly tied braided hook-section loop. Do not substitute an undefined pair of loops for a tested connection.
Can I make a Combi Rig from coated braid?
Yes. Leave most of the coating intact and strip a short section near the hook. This creates a simpler one-material combi effect and removes the separate joining knot.
Can a Combi Rig be used with a pop-up?
A low pop-up can be balanced with putty at the join, but the complete rig must be water-tested. For a consistently low pop-up or a taller specialized presentation, a Ronnie, Multi or hinged rig may be more direct.
Where should the putty go?
Place a small amount over or immediately behind the tested Albright join. It can pin the transition and balance a buoyant bait. Do not put it on the soft section near the hook or use it to hide a poor knot.
Is fluorocarbon always the best boom material?
No. Fluorocarbon can be stiff, abrasion-resistant and fast sinking, but it may bridge on uneven bottom. A softer mono or semi-stiff coated braid can follow contours better. Choose by lakebed and presentation rather than visibility claims alone.
How often should I replace the rig?
Inspect it after every fish and retrieve. Replace the hook immediately when damaged, and retie the complete rig if the boom is kinked, braid is frayed, Albright has moved, hair is worn or either connection is uncertain.
Final Combi Rig Checklist
- Hook pattern, size and hookbait leave the point and gape exposed.
- Stiff boom has no crease, flat spot or stress mark.
- Supple section is short enough to remain controlled.
- Albright coils lie neatly without crossing.
- Braid tag returns through the boom loop beside the standing braid, with both braid sections leaving on the same side.
- Albright and lead-end connection have been pull-tested separately.
- Putty is used for presentation, not to repair or hide a weak knot.
- Finished rig length matches the actual lakebed and lead penetration.
- Hookbait balance has been checked in water.
- Boom, join and hook section settle correctly during the margin test.
- Hook point is checked after every retrieve.
- Lead and leader arrangement can separate safely if the mainline breaks.
Next Steps
- Carp Rig Guide for Michigan — choose the correct rig family before refining the material transition.
- Hair Rig for Carp Fishing — learn the simpler hook section used in this classic Combi build.
- Slipped D Rig — compare a mobile D-style bait attachment.
- Multi Rig for Carp Fishing — understand the quick-change loop used in the Combi Multi variation.
- Bottom-Bait Rigs — compare hairs, blowback arrangements and balanced-bait presentations.
- Lead Clip vs Inline vs Helicopter — match the hooklink to the complete end-tackle system.
- Ronnie Rig for Carp Fishing
Technical References
- Korda: Combi Rig Guide — overview of two-material, coated-braid, crimped and Combi Multi constructions.
- Gardner Tackle: Albright Knot Video — visual braid-to-mono/fluorocarbon tying sequence.
- Gardner Tackle: The Combi Rig — classic stiff-boom and short-supple-section example.
Tight lines — keep it simple, keep it safe, and let the lakebed decide.