

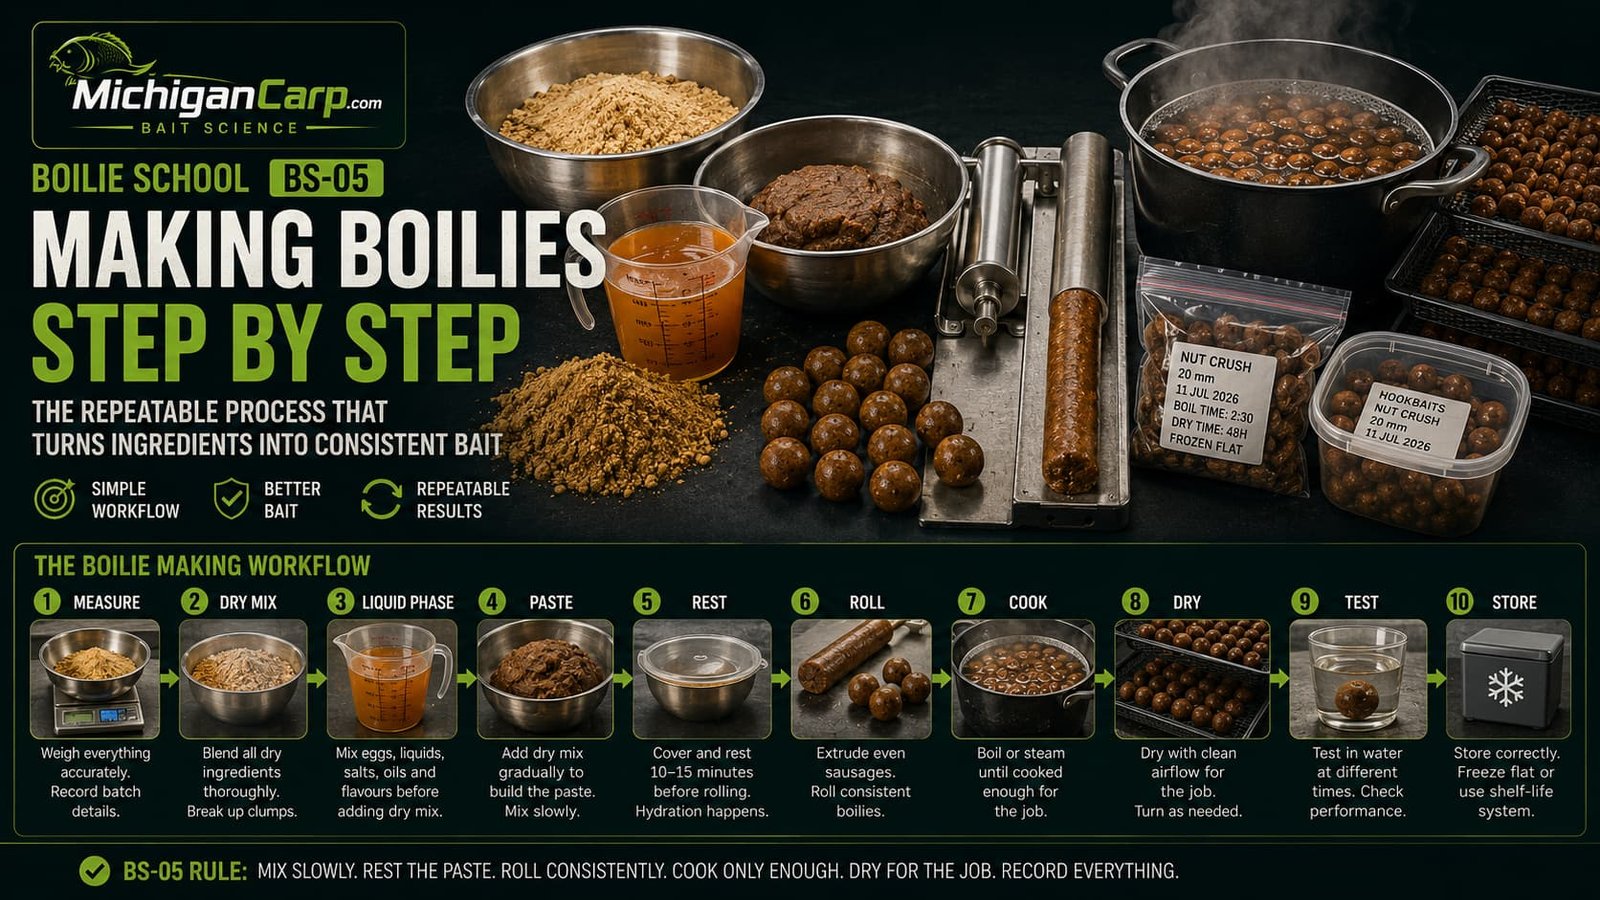
Making boilies step by step
Making boilies step by step is not just following a recipe.
A good boilie is not finished when the dry mix totals 1 kg. The bait still has to be mixed, rested, rolled, cooked, dried, tested and stored in a way that produces the same result again.
This is where many homemade boilies fail.
The formula may be good. The ingredient logic may be sound. The liquid phase may make sense. But if the paste is rushed, the dry mix is dumped in too quickly, the sausages are uneven, the bait is overboiled, the drying is random or the storage is careless, the final bait can still be inconsistent.
Boilie School BS-05 is the workflow lesson. The goal is not factory perfection. The goal is a simple repeatable process that lets you make, test and improve bait without guessing.
This article covers the full boilie-making process from weighing ingredients to storing finished bait. For specialist details, use the deeper support guides as needed: How to Formulate a Milk, Nut and Birdfood Boilie Base Mix, Boilie Liquids and Additives, How to Boil and Dry Boilies Properly, How to Test Boilies Before Fishing and How to Store Homemade Boilies.
Boilie School navigation: Previous Lesson: BS-04 — Boilie Liquids and Additives | Back to Boilie School Hub | Next Lesson: BS-06 — Using Boilies on the Bank.
For external technical background on food moisture and freezing principles, see FDA: Water Activity in Foods and USDA FSIS: Freezing and Food Safety.
Table of Contents
Quick Start: The Boilie Making Process
The boilie-making process is easier to control when you treat it as a sequence of stages.
| Stage | Main job | Common failure |
|---|---|---|
| Measure | Weigh ingredients and record the batch | Guessing weights or changing products without notes |
| Dry mix | Blend powders evenly before liquids are added | Uneven distribution of binders, powders or fine additives |
| Liquid phase | Mix eggs, liquids, salts, sweeteners, oils and flavours before dry mix | Adding liquids randomly after the paste has already formed |
| Paste building | Add dry mix gradually until the paste is right | Dumping everything in at once and overcorrecting |
| Resting | Let the paste hydrate before final adjustment | Correcting too soon |
| Extrusion and rolling | Make consistent sausages and even boilies | Mixed sizes, flats, splits and uneven cooking |
| Cooking | Set the bait enough for handling and fishing | Overboiling for hardness or undercooking weak bait |
| Drying | Dry for the bait’s job | Using the same drying target for every bait |
| Testing | Check the finished bait in water and on the rig | Trusting dry appearance only |
| Storage | Store according to freezer, air-dried or shelf-life plan | Sealing warm or damp bait too soon |
The simple BS-05 rule is:
Mix slowly. Rest the paste. Roll consistently. Cook only enough. Dry for the job. Record everything.
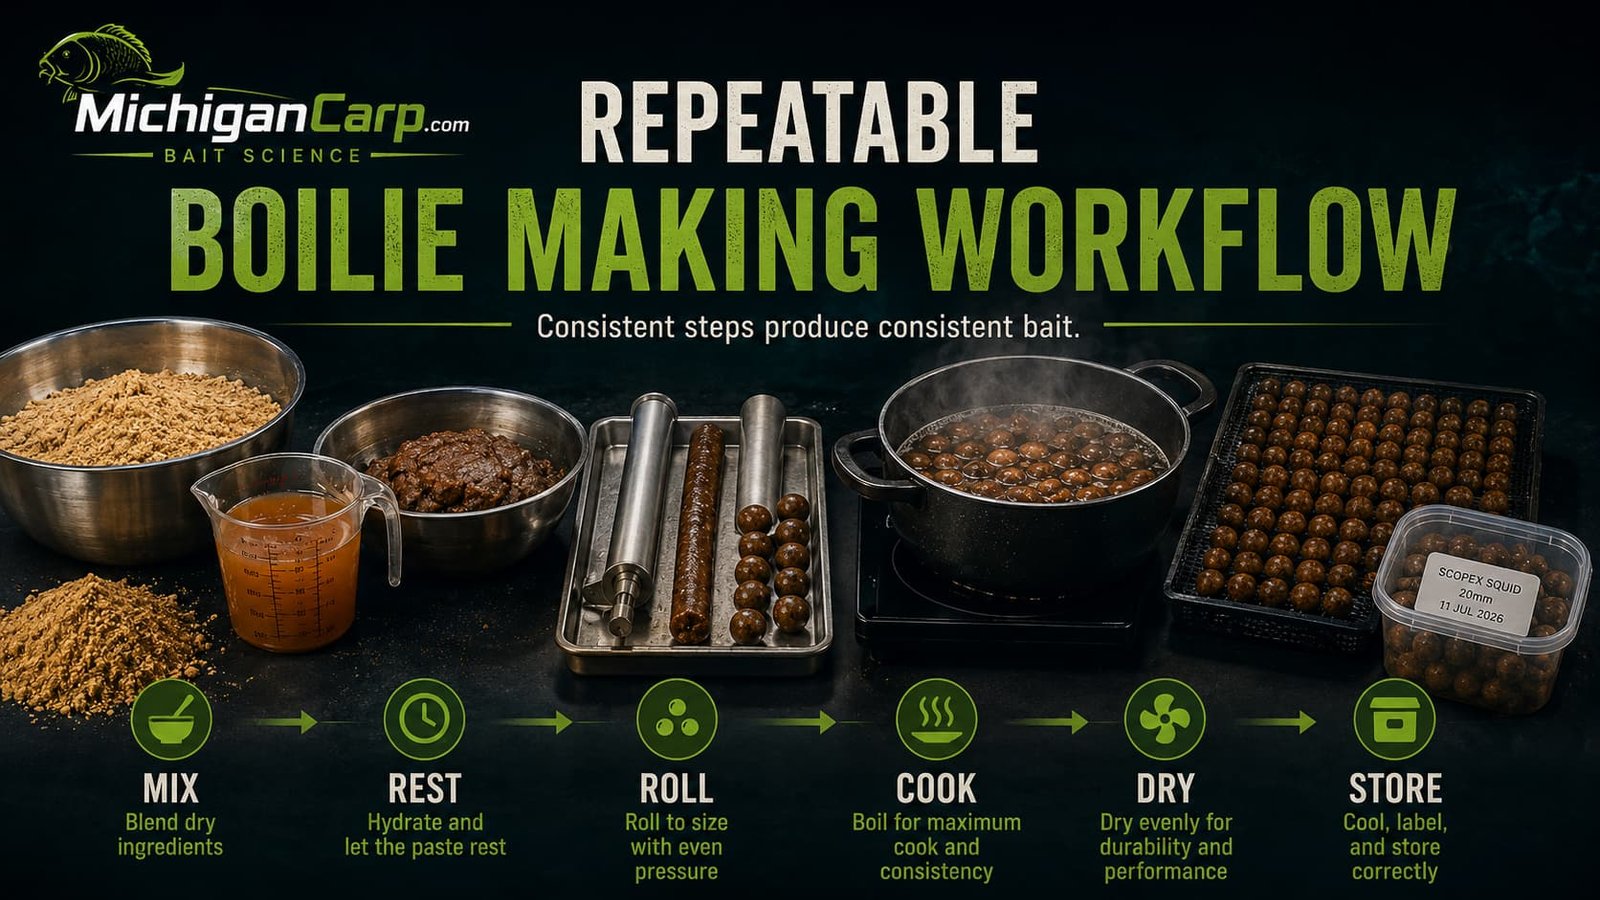
Why Repeatability Matters
The difference between random homemade bait and serious homemade bait is not expensive ingredients. It is repeatability.
If every batch is made differently, you cannot tell whether a bait improved because of the recipe, the process, the conditions or luck. If one batch catches and the next batch fails, you need to know whether the change was dry mix, liquid phase, paste feel, rolling size, boil time, drying time, storage or fishing situation.
Repeatability does not mean you need commercial machinery. It means you can make the same bait again closely enough to learn from it.
| Repeat this | Why it matters |
|---|---|
| Ingredient products | Different milk powders, nut meals and birdfoods can behave differently |
| Dry weights | Small changes can alter binding, rolling and drying |
| Liquid phase | Egg size, oil, syrups and soluble liquids change paste feel |
| Rest time | Hydration changes before rolling |
| Bait size | Size affects cooking, drying, leakage and water life |
| Cooking method | Boiling and steaming do not behave identically |
| Drying target | Drying changes hardness, storage and release |
| Storage method | Freezer bait, air-dried bait and shelf-life bait are different systems |
A simple bait made consistently teaches more than a complicated bait made randomly.
Step 1: Measure and Prepare the Dry Mix
The first step is boring, which is exactly why it matters.
Weigh the dry ingredients accurately. Record the products used. Break up clumps. Mix powders thoroughly before they touch the liquid phase.
If the dry mix is not even, the finished boilies may vary inside the same batch. One bait may contain more binder, another more birdfood, another more nut flour and another more fine additive. That is not controlled bait making. That is uneven distribution.
| Dry-mix check | What to record or control |
|---|---|
| Total dry weight | Usually 1 kg for test batches and recipe comparison |
| Ingredient names | Use exact product names where possible |
| Supplier or brand | Important for milk powders, proteins, birdfoods and meals |
| Clumps | Break up milk powder, protein powder, sweetener or preservative clumps |
| Fine additives | Distribute small-dose ingredients evenly |
| Coarse ingredients | Check whether particle size will roll cleanly |
This matters especially with milk powders, casein, WPC80, albumen, birdfoods, seed meals, hydrolysate powders, powdered flavours, preservatives and any ingredient used at a small dose.
For base-mix structure, use Boilie Base Mix Families and How to Formulate a Milk, Nut and Birdfood Boilie Base Mix.
Step 2: Build the Liquid Phase First
The liquid phase should be prepared before the dry mix is added.
Do not throw dry powder into eggs and then start adding random liquids afterward. That makes the paste harder to control and can create uneven liquid distribution.
| Liquid phase order | Practical reason |
|---|---|
| Eggs first | They are the main wet binder in many homemade boilies |
| Water-based liquids | Mix soluble signals and food liquids evenly |
| Salt, minerals or sweetener | Distribute small functional additions before paste forms |
| Preservative system if used | Must be handled deliberately, not guessed late |
| Oil only if needed | Count built-in fat before adding extra oil |
| Flavour last | Allows the rest of the liquid phase to be built first |
Oil is optional. Many milk, nut and seed mixes already contain meaningful fat from nut meals, milk powders, seed ingredients or full-fat components. Adding more oil without counting the existing fat can create greasy paste, soft bait, slow drying and storage problems.
For the deeper liquid-phase guide, use Boilie Liquids and Additives. For fat balance, use How to Balance Fat in Boilies.
Step 3: Add Dry Mix Gradually
This is one of the most important practical habits in boilie making.
Add the dry mix in stages. Mix. Add more. Mix again. As the paste begins to form, slow down.
The last 50–100 g of dry mix can change the paste quickly. Sometimes the paste is right before every gram of dry mix has been used. That does not automatically mean the recipe is wrong. Egg size, ingredient grind, humidity, liquid viscosity and product variation all affect absorption.
| Paste condition | What it suggests | What to do |
|---|---|---|
| Wet and sloppy | Too much liquid or dry mix added too slowly for the batch | Add dry mix gradually, then rest before judging |
| Sticky but forming | May only need hydration time | Cover and rest before correcting |
| Crumbly | Too dry, not hydrated, or weak binder system | Add tiny amounts of liquid only after kneading and resting |
| Greasy | Too much added oil or high built-in fat | Do not keep adding powder blindly; review formula next batch |
| Firm but flexible | Usually close to rolling condition | Rest, then extrude a small test sausage |
Step 4: Rest the Paste Before Correcting It
Many beginners correct the paste too soon.
The paste feels sticky, so they add dry powder. Ten minutes later it becomes stiff, so they add liquid. Then it becomes soft. The batch begins drifting away from the formula.
Resting helps prevent that.
After mixing, cover the paste and rest it for about 10–15 minutes, then reassess. This is especially important with milk powders, caseins, nut flours, birdfoods, wheatgerm, seed meals, coconut ingredients and hydrolysate powders because they may continue taking up moisture after the paste first comes together.
| Resting helps improve | Practical result |
|---|---|
| Hydration | Ingredients finish taking up moisture |
| Extrusion | Sausages come out smoother and more consistent |
| Rolling | Boilies form with fewer tears and flats |
| Surface condition | Bait skins look cleaner before cooking |
| Repeatability | You judge paste after a consistent rest period |
Sometimes the paste did not need a correction. It only needed time.
Step 5: Extrude and Roll Consistently
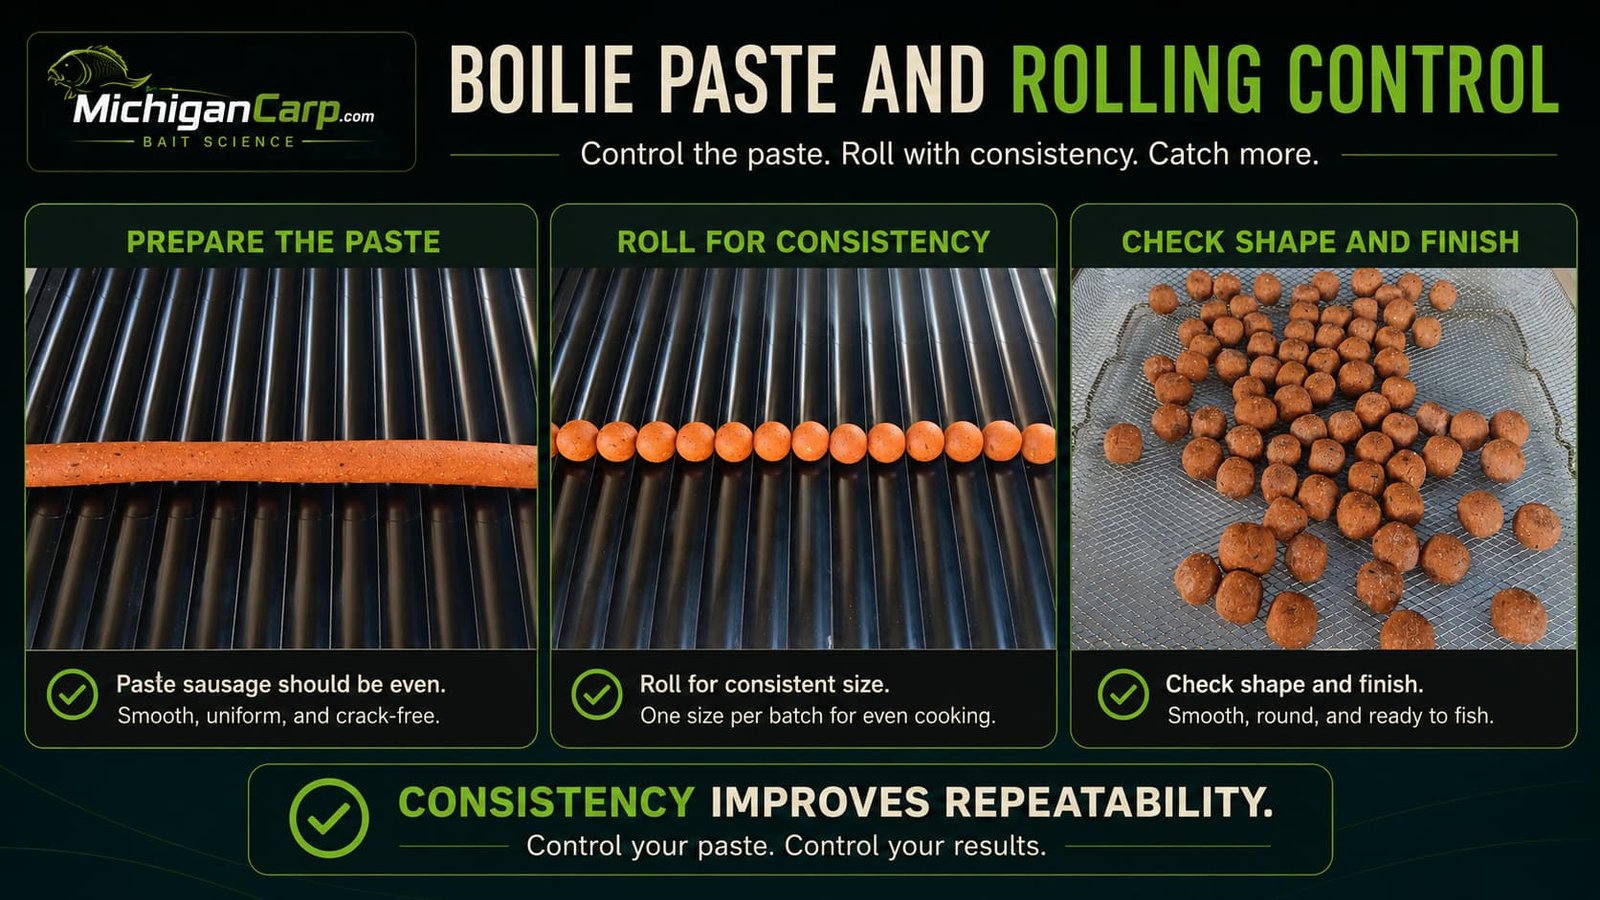
Whether you use a bait gun, sausage gun, battery caulk gun or hand rolling, the goal is consistent sausage diameter.
Uneven sausages create uneven boilies. Uneven boilies cook differently. Different cooking creates different hardness, drying and water behaviour.
| Rolling control | Why it matters |
|---|---|
| Nozzle size | Should match the rolling table and bait diameter |
| Sausage thickness | Too thick or too thin creates poor roundness |
| Paste moisture | Too wet smears; too dry cracks |
| Rolling pressure | Too much pressure can flatten or tear bait |
| One size per batch | Makes cooking, drying and testing easier |
For many homemade bait makers, it is sensible to start with one size per batch: 16 mm, 18 mm, 20 mm or 24 mm. Once the process is controlled, mixed sizes can be made deliberately.
The correct size depends on nuisance fish, target carp size, baiting style, rig choice, casting, water depth and session length. But for learning, one size per batch makes the result easier to judge.
Step 6: Boil or Steam the Bait
Both boiling and steaming can work. The important point is to choose one method and control it.
| Method | Strength | Risk |
|---|---|---|
| Boiling | Simple, fast, repeatable and beginner-friendly | Overboiling can make bait harder and less active than intended |
| Steaming | Can be gentler and may reduce direct loss into boiling water | Timing can be less obvious and large batches can be less convenient |
My beginner recommendation is simple: learn boiling first, then test steaming later if you have a reason.
Do not change cooking method and recipe at the same time. If you alter the formula and switch from boiling to steaming in the same batch, the result becomes difficult to interpret.
For the full practical boil-time guide, use How to Boil and Dry Boilies Properly. For heat, structure and release, use What Boiling Does to Carp Bait.
Step 7: Cook Enough, Not Forever
The purpose of cooking is not to make every bait as hard as possible.
The purpose is to set the skin, stabilize the shape, firm the paste, make the bait practical to handle and preserve enough internal working quality for the bait’s job.
| Cooking problem | Likely result | Better practice |
|---|---|---|
| Undercooked bait | Soft, weak, split-prone or unstable in storage | Increase cook time slightly and test again |
| Overcooked free bait | Unnecessarily hard, rubbery or slow to work | Cook for the bait’s job, not maximum hardness |
| Pan overloaded | Temperature drops and timing becomes inconsistent | Use smaller batches |
| Dirty boiling water | Foam, starch, oils and fines coat the bait | Change water when needed |
| Using floating as the only timer | Misleading results with different recipes | Use controlled timing and later soak testing |
Ask the better question:
How long does this bait, at this size, need to become practical without being overdone?
Free bait and hookbait do not always need the same cooking target. Free bait may need to remain easier to eat and more active. Hookbaits may need more durability.
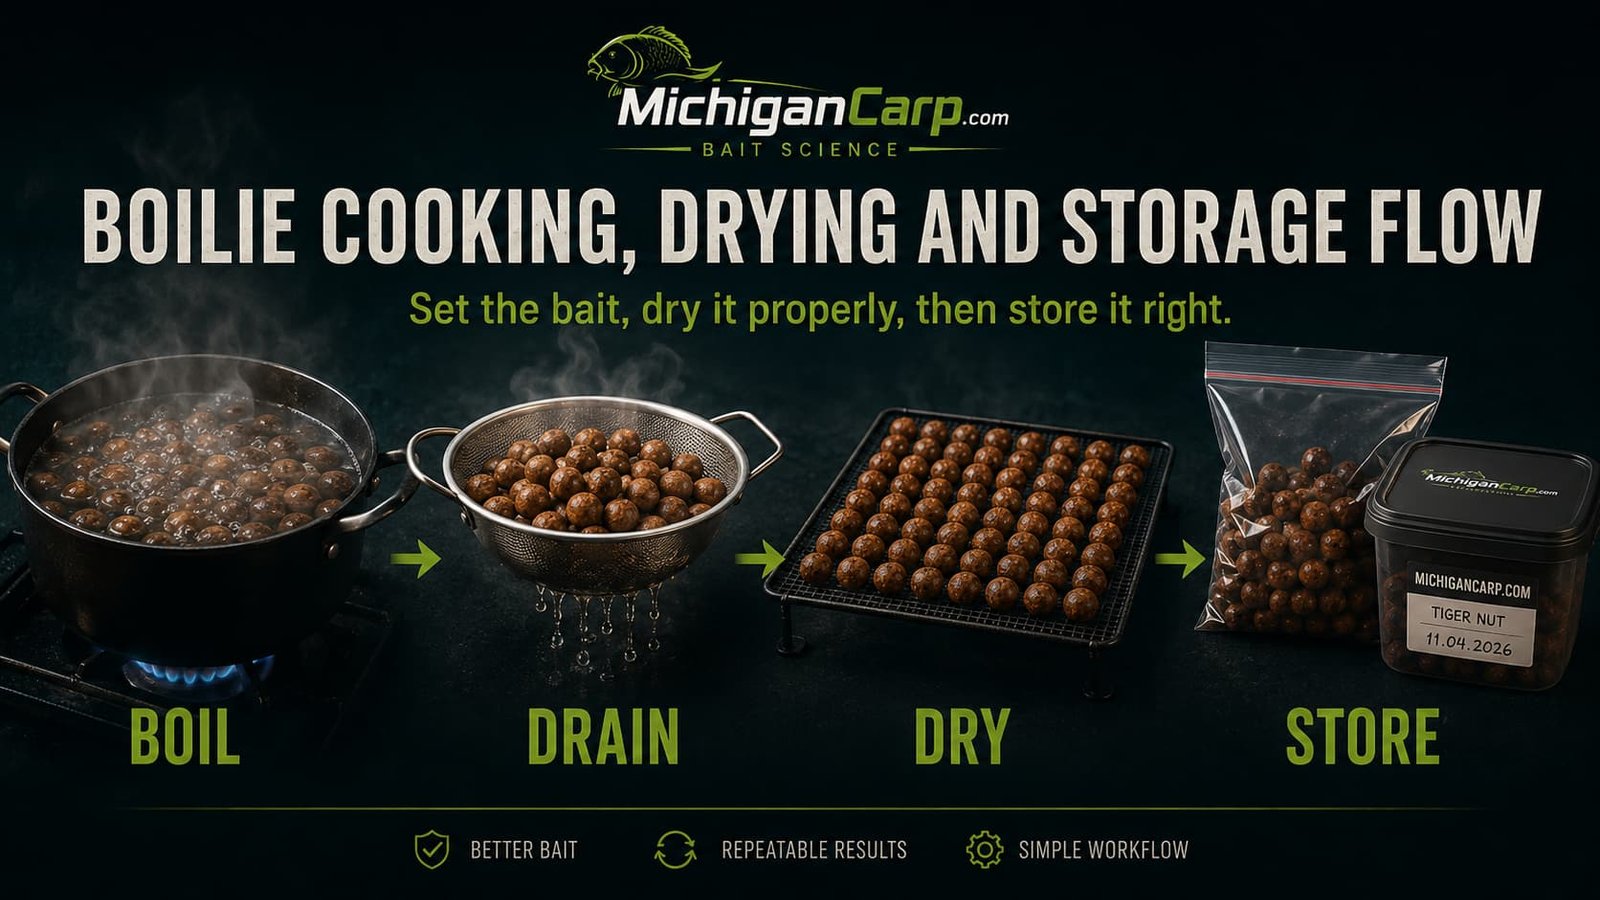
Step 8: Drain, Dry and Store for the Job
After cooking, remove boilies cleanly and drain them well.
Do not pile hot wet boilies in a deep bucket or seal them in plastic. That traps steam, creates condensation and can lead to damp, sticky or unstable bait later.
| After cooking | Good practice |
|---|---|
| Draining | Use a spider strainer, slotted spoon, towel briefly or draining tray |
| Cooling | Let steam escape before bagging or storing |
| Drying surface | Use mesh trays, drying racks or shallow layers |
| Airflow | Use clean airflow rather than harsh heat |
| Turning | Shake or turn baits where needed for even drying |
| Storage | Choose freezer, short-term air-dried or shelf-life system deliberately |
Drying should match the job. Same-day bait, freezer bait, harder freezer bait, hookbaits, wafters, pop-ups and shelf-life bait do not all need the same drying target.
Do not assume air-dried means shelf-life. Drying reduces moisture, but true shelf-life bait requires proper formulation, preservation, water-activity thinking, packaging and retained-sample testing.
For drying and storage details, use How to Boil and Dry Boilies Properly, How to Tell When Boilies Are Dry Enough, How to Store Homemade Boilies and Potassium Sorbate, Sodium Benzoate and Citric Acid in Shelf-Life Boilies.
Step 9: Test Finished Boilies Before Fishing
A boilie is not fully judged when it leaves the pan or drying rack.
Test it in water.
Home testing does not prove carp preference, but it does show important physical behaviour: softening, swelling, cracking, crumb release, hookbait strength, buoyancy change and whether storage or glugging altered the bait.
| Test | What to check |
|---|---|
| 1-hour soak | Early surface softening and visible release |
| 4-hour soak | Day-session durability and structure |
| Overnight soak | Hookbait survival and freebait persistence |
| Cut-after-soak test | Core hydration and internal condition |
| Rig test | Hair hold, bait-screw strength, buoyancy and presentation |
| Storage retest | Whether freezing, drying or glugging changed the bait |
For the full testing system, use How to Test Boilies Before Fishing. For wafters and pop-ups, use How to Make Wafters and Pop-Ups From a Boilie Base Mix.
Hookbaits and Freebaits Are Not Always the Same
A perfect freebait is not automatically a perfect hookbait.
Free offerings may be designed to soften, leak, break down slowly and encourage feeding. Hookbaits must also survive casting, nuisance attention, hair pressure, bait screws, long soak time and rig mechanics.
| Bait type | Main job | Process difference |
|---|---|---|
| Freebait | Food value, acceptance and feeding activity | Often softer, more open or less heavily dried |
| Bottom-bait hookbait | Durable rig bait with matching food identity | May be boiled or dried slightly longer |
| Wafter | Balanced bait matched to hook weight | Must be tested with the actual hook and rig |
| Pop-up | Buoyant presentation | Must retain lift after intended soak time |
| Special hookbait | Point bait, attraction or nuisance resistance | May use different binders, cork, harder drying or controlled treatment |
Do not ruin a good freebait by forcing it to behave like a rock-hard hookbait. Make the hookbait version separately when needed.
Troubleshooting the Making Process
Most boilie-making problems can be traced back to paste, rolling, cooking, drying or storage.
| Problem | Likely causes | Practical fix |
|---|---|---|
| Paste too sticky | Too much liquid, not enough rest, too much syrup or hydrolysate, weak dry structure | Rest first, then add dry mix carefully only if needed |
| Paste too crumbly | Too little liquid, dry mix added too fast, coarse material, weak binder | Knead, rest, then add tiny liquid amounts if needed |
| Sausages split | Paste too dry, coarse particles too large, poor rest or nozzle mismatch | Rest longer, adjust moisture and check particle size |
| Boilies crack during drying | Dry paste, overcooking, aggressive drying, poor rolling or coarse inclusions | Slow drying, adjust paste hydration and review cooking time |
| Boilies go too hard | Overcooking, over-drying, too much binder or closed formula | Reduce cook/dry time and test water behaviour |
| Boilies stay too soft | Undercooking, excessive liquid, weak structure, too much soluble material or insufficient drying | Improve structure, cook properly, dry longer and retest |
| Finished bait feels greasy | Too much added oil, high-fat ingredients or poor drying | Count built-in fat and reduce oil pressure next batch |
For deeper failure diagnosis, use Boilie Problems: Real Causes and Fixes.
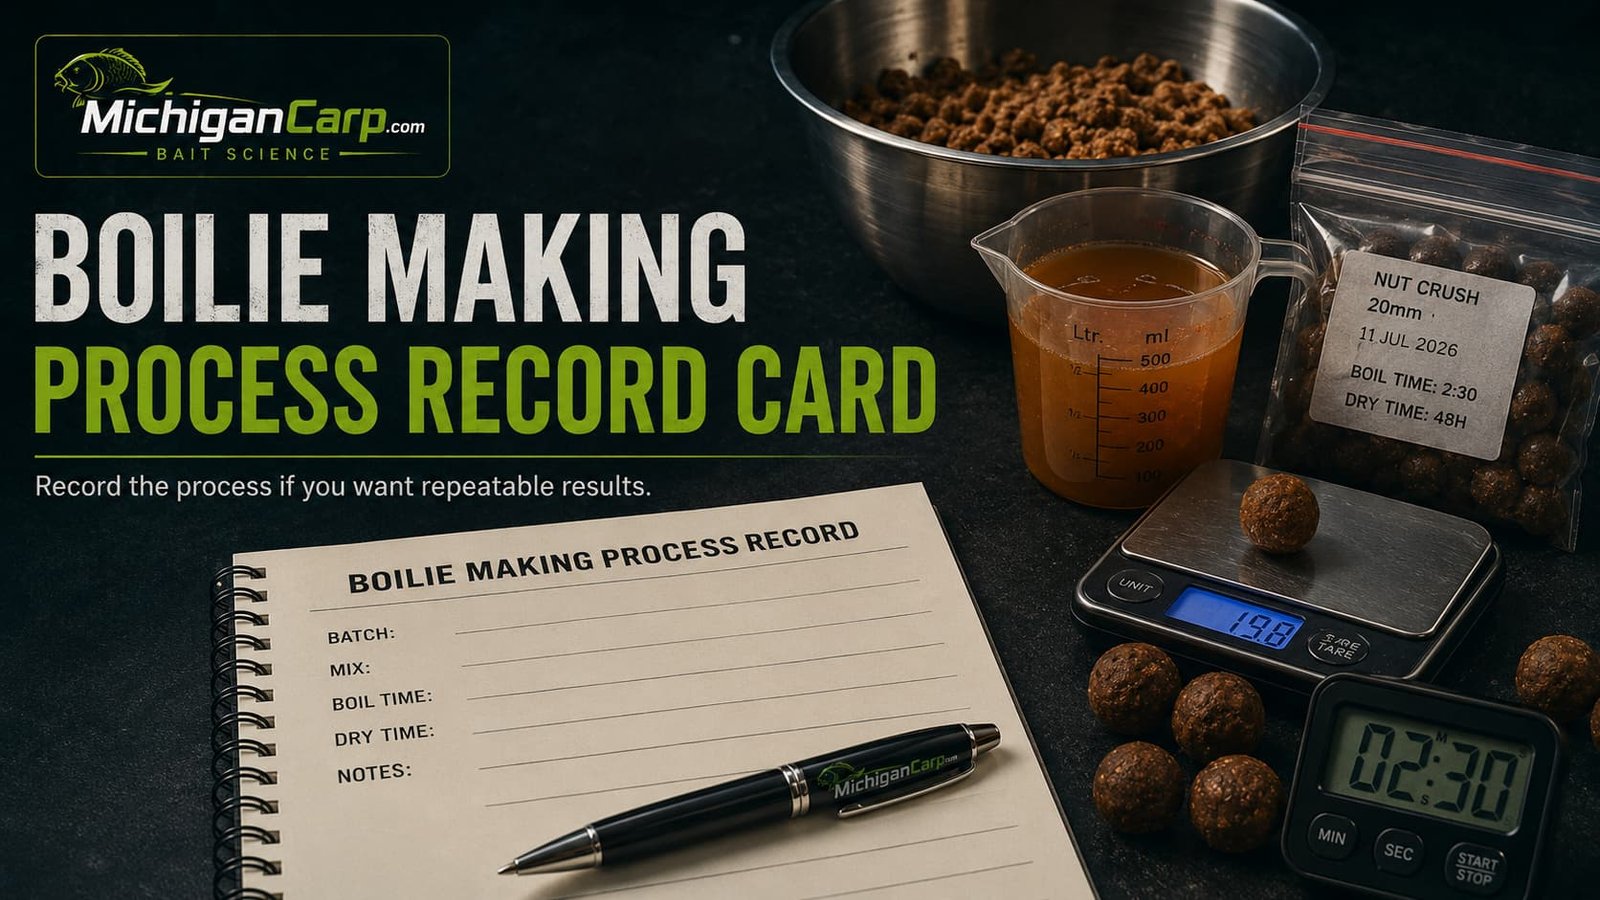
Record the Process Like a Bait Maker
A good bait notebook should include more than the ingredient list.
Record the process. That is how you learn which changes matter.
| Record category | What to note |
|---|---|
| Dry mix | Recipe name, ingredient weights, supplier notes and batch size |
| Liquid phase | Egg weight or number, liquids, oil, flavour, sweetener, salt and minerals |
| Paste | How much dry mix was used, rest time, paste feel and corrections |
| Rolling | Bait size, nozzle size, rolling table and problems |
| Cooking | Boiling or steaming, batch size, time, water condition and observations |
| Drying | Drying surface, airflow, drying time, humidity and final bait feel |
| Storage | Freezer, air-dried, shelf-life, hookbait tub, date stored and date used |
| Testing | Soak time, softening, cracking, buoyancy, hookbait strength and fishing notes |
Do Not Change Too Many Things at Once
This is one of the biggest lessons in homemade bait development.
If a batch fishes badly and the next time you change the dry mix, liquid phase, flavour, boil time, drying time, hookbait treatment and baiting amount, you will not know what caused the result.
If the next session improves, what caused the improvement?
You do not know.
If the next session fails, what caused the failure?
You still do not know.
Change one major variable at a time when possible.
| Better test | Why it works |
|---|---|
| Same recipe, different boil times | Shows cooking effect |
| Same recipe, different drying times | Shows drying effect |
| Same bait, treated vs untreated hookbait | Shows treatment effect |
| Same bait, whole vs chopped vs crumb | Shows surface-area and format effect |
| Same bait, fresh vs stored | Shows storage effect |
This is how bait making becomes development instead of guesswork.
Michigan Notes
Much of my fishing involves wild public-water carp, and that changes how I think about making boilies.
A bait may need to survive a long drive, warm weather, boat work, buckets, multi-day sessions, nuisance fish, crayfish and long periods on the hair. At the same time, I do not want to dry every bait into a dead rock.
Michigan fishing often rewards a practical middle ground: bait firm enough to handle, soft enough to work, durable enough for the session and repeatable enough to trust.
| Michigan situation | Process priority |
|---|---|
| Short spring session | Controlled paste, active bait, lighter feed and proper soak testing |
| Warm summer overnight | Hookbait durability, storage discipline and controlled glugging |
| Multi-day dam-pond session | Session bags, durable hookbaits, fresh bait management and notes |
| Natural-food-rich water | Balanced food bait, believable texture and consistent production |
| Nuisance pressure | Hookbait strength without making every freebait over-hard |
BS-05 is not glamorous, but it decides whether the bait designed on paper actually works on the bank.
Common Boilie-Making Mistakes
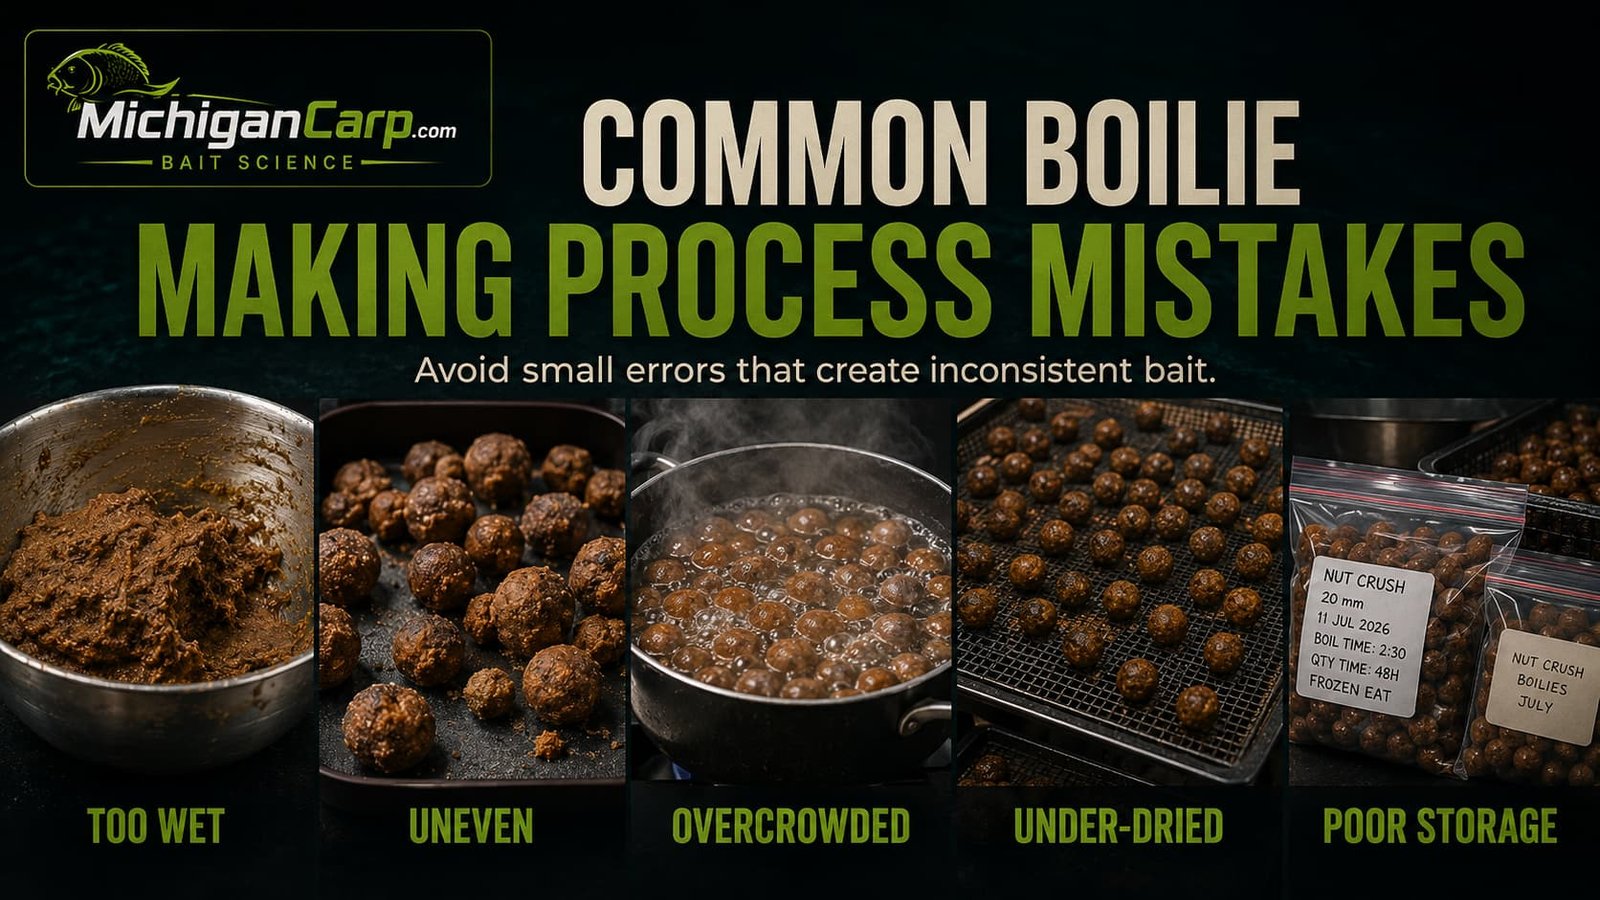
| Mistake | Why it hurts the bait | Better practice |
|---|---|---|
| Dumping dry mix in all at once | Paste becomes harder to control | Add dry mix gradually |
| Correcting paste before resting | The batch drifts away from the formula | Rest 10–15 minutes before final adjustment |
| Rolling uneven sizes | Baits cook and dry differently | Use matched nozzle, table and paste condition |
| Overboiling for hardness | Free bait can become too hard or slow | Cook enough for the bait’s job |
| Drying every batch the same way | Hookbaits, freebaits and shelf-life bait need different targets | Dry according to use |
| Sealing warm bait too soon | Condensation creates storage problems | Cool and surface-dry first |
| Treating freezer and shelf-life bait the same | False shelf-stability confidence | Use proper storage and preservation logic |
| Never water-testing finished bait | Dry appearance hides water behaviour | Soak test before important sessions |
| Changing too many variables together | You cannot interpret results | Change one major variable at a time |
| Not keeping notes | You cannot repeat success | Record formula, process, storage and results |
My Practical View
Boilie making is not just recipe writing. It is process control.
A good formula can be ruined by poor mixing, rushed paste, uneven rolling, overcooking, bad drying or careless storage. A simpler formula made consistently often teaches more than an advanced formula made randomly.
That is why every homemade bait maker should take the bench process seriously.
Not because we need to imitate a commercial factory, but because carp fishing already has enough variables. Location, weather, fish movement, natural food, pressure, baiting and timing all affect results. The bait itself should not be another uncontrolled variable.
Make the bait the same way before you judge whether the bait works.
That is the point of Boilie School BS-05.
FAQ
What is the most important part of making boilies?
Repeatability. A good bait must be mixed, rested, rolled, cooked, dried, tested and stored consistently before you can judge whether the recipe itself is working.
Should I add all the dry mix at once?
No. Add dry mix gradually to the liquid phase. Slow down as the paste begins to form because the final portion of dry mix can change texture quickly.
How long should boilie paste rest before rolling?
A practical starting point is 10–15 minutes. This gives milk powders, nut flours, birdfoods, seed meals, caseins and binders time to hydrate before you correct the paste.
Why are my boilies cracking?
Common causes include dry paste, uneven rolling, coarse particles, overcooking, aggressive drying or poor binding. Check the process before blaming one ingredient.
Is boiling better than steaming?
Not always. Boiling is simple, fast and repeatable for beginners. Steaming can be useful, but it requires good timing and process control.
How long should I boil boilies?
There is no universal time. It depends on bait size, formula, soluble content and intended use. Cook enough to set the bait without overcooking it.
Should boilies float when they are cooked?
Floating can happen with some baits, but it is not a universal timing rule. Use controlled timing, bait size, batch size and soak testing instead of relying only on floating.
How dry should boilies be?
Dry them according to the job. Same-day bait, freezer bait, harder freezer bait, hookbaits, wafters, pop-ups and shelf-life bait all need different drying logic.
Can I freeze homemade boilies?
Yes. Freezing is often the simplest and cleanest storage route for homemade bait. Cool and surface-dry the bait first, then freeze in labeled session bags.
Are shelf-life boilies just air-dried freezer boilies?
No. A true shelf-life bait needs a deliberate preservation and storage system. Air-drying alone does not prove long-term shelf stability.
Should hookbaits be dried longer than freebaits?
Often, yes. Hookbaits may need more durability, while freebaits may be designed to soften and work faster. Test the hookbait on the actual rig.
Why do my boilies go too hard?
They may be overcooked, over-dried, over-bound or too closed in structure. Water-test them before assuming hardness is a benefit.
Why do my boilies stay too soft?
Possible causes include undercooking, excessive liquid, weak structure, too much soluble material, insufficient binder or too little drying.
How should I test finished boilies?
Test them in water at times that match the fishing job, such as one hour, four hours and overnight. Check swelling, cracking, softening, breakdown and hookbait strength.
What notes should I keep when making boilies?
Record dry mix, liquid phase, paste rest, rolling size, cooking method, boil time, drying time, storage method, water-test results and fishing results.
Next Steps
- Previous Lesson: BS-04 — Boilie Liquids and Additives
- Next Lesson: BS-06 — Using Boilies on the Bank
- Back to Boilie School Hub
- How to Formulate a Milk, Nut and Birdfood Boilie Base Mix — build the base bait before the making process.
- Boilie Liquids and Additives — build the liquid phase properly.
- How to Boil and Dry Boilies Properly — control boiling, draining, drying and freezer preparation.
- How to Test Boilies Before Fishing — test water uptake, softening, cracking and rig durability.
- How to Store Homemade Boilies — manage freezer bait, air-dried bait, glugged bait and hookbait tubs.
- How to Prepare Boilies for Carp Fishing — apply glugs, soaks and hookbait conditioning after production.
- Boilie Problems: Real Causes and Fixes — troubleshoot sticky paste, cracking, soft bait and hard bait.
- Bait Science — browse the technical bait library.