

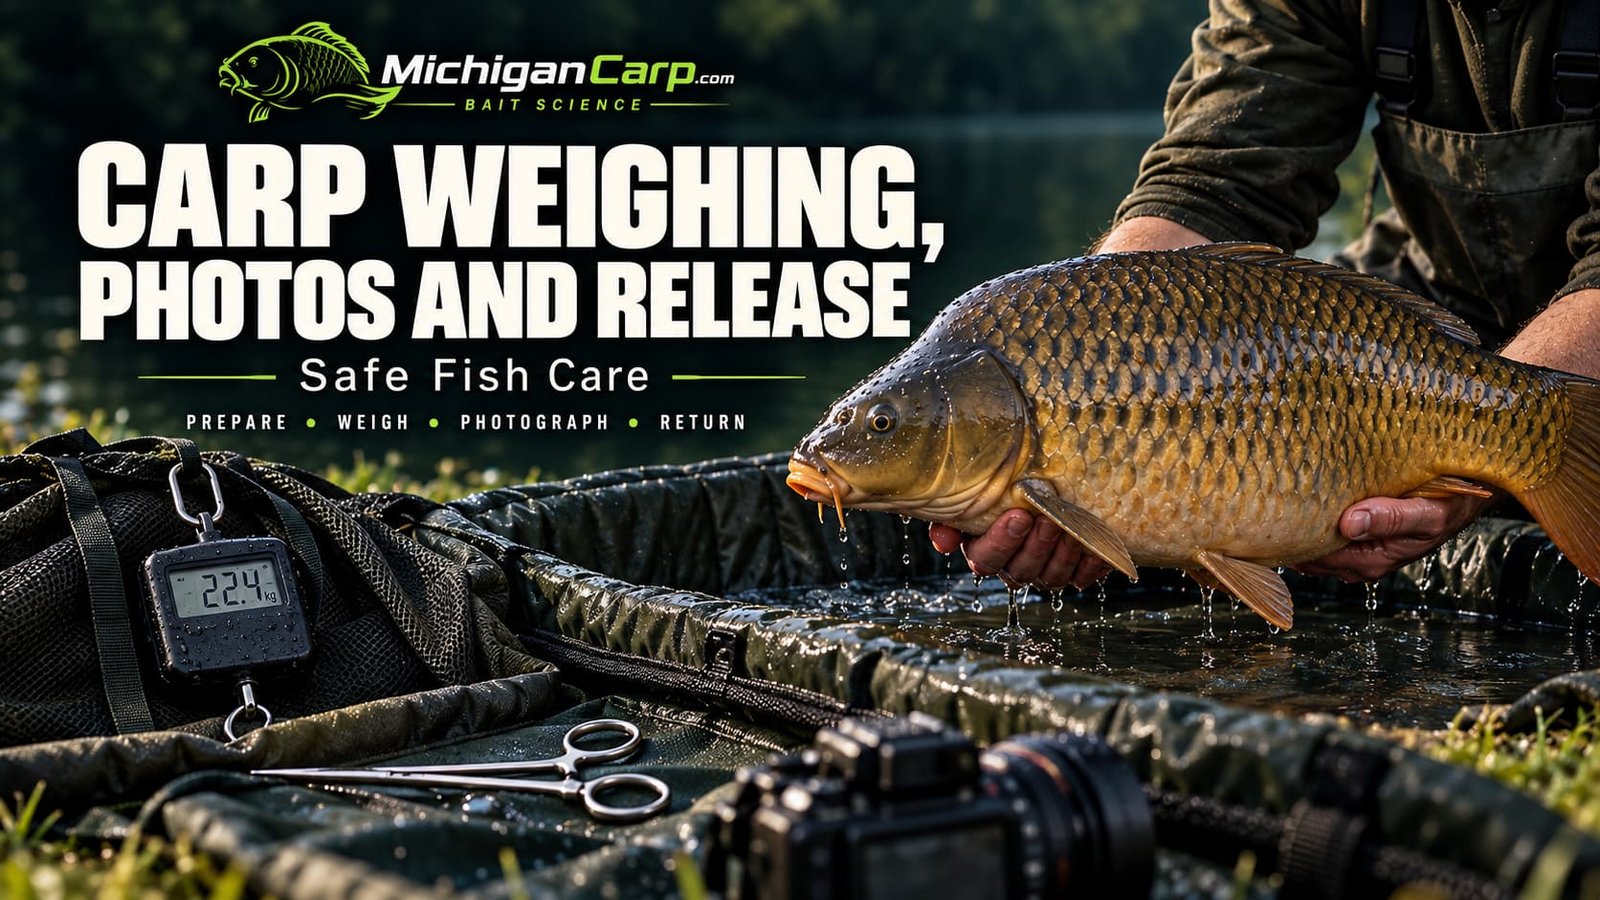
Carp fish care after capture means keeping the fish wet, supported and protected while weighing, photographing and returning it safely to the water. The weighing and photographs are optional; a strong, controlled release is the priority.
Releasing it in the best condition you reasonably can is not.
Once a carp reaches the unhooking mat or cradle, the aim should be to complete everything calmly, keep unnecessary handling to a minimum and return the fish safely without turning the capture into a long bank-side production.
For large carp in particular, preparation matters. A forty-pound fish can move suddenly, and the safest time to organize scales, sling, camera, mat and water is before the fish is lying on the bank.
This guide covers the MichiganCarp.com routine for weighing, photographing and releasing carp after unhooking.
For the wider process from landing net through handling and bank setup, start with Carp Fish Care and Safety.
Table of Contents
Quick Start: Weigh, Photograph and Release
| Stage | Main Rule | Practical Standard |
|---|---|---|
| Prepare | Organize before lifting the fish | Wet sling, scales zeroed, camera ready, mat wet |
| Weigh | Fully support the carp | Lift in a proper weigh sling only as high as necessary |
| Photo | Stay low | Kneel over the mat and support the fish horizontally |
| Fish movement | Lower, do not grip harder | If the carp tenses or kicks, bring it back onto the mat |
| Time | Keep the process efficient | Avoid unnecessary repeated weighing or multiple photo sessions |
| Return | Use the sling where practical | Carry a large carp securely back to the water |
| Recovery | Let the fish regain balance | Hold it upright until it can maintain position and swim away strongly |
| Priority | Fish condition comes first | Skip the photo or weight if conditions make them a poor idea |
From Landing Net to Mat
Once the carp is safely in the landing net, the priority changes from playing the fish to controlling the transfer.
Do not rush to lift the fish immediately. Keep the carp in the water while the mat or cradle, weigh sling, forceps and water are made ready. If photographs or a weight are wanted, prepare the scales and camera now rather than after the fish is already on the bank.
Before moving the carp, check that the route from the water to the mat is clear of rocks, branches, tackle, banksticks and anything else that could cause a trip or force you to put the fish down unexpectedly.
For a large carp, use the landing net only to secure the fish in the water. When practical, transfer the carp into a suitable wet weigh sling or transfer sling before carrying it to the mat. This provides better full-body support and reduces the risk of the fish rolling or dropping during the move.
Keep the fish low throughout the transfer.
Do not drag a carp up the bank in dry landing-net mesh and do not carry it suspended by the net handle.
Once on the mat or cradle:
- keep the fish centered on the padded area
- wet your hands before touching it
- keep fins lying naturally against the body
- remove the landing-net mesh carefully if it is still around the fish
- keep water available to wet the fish and equipment when needed
- make sure the fish cannot roll from the mat or cradle
If the carp becomes lively, concentrate on controlling and protecting it rather than immediately beginning the weighing or photography routine.
The safest transfer is usually the one that has been planned before the bite.
For appropriate nets, mats, cradles and slings, use Landing Gear for Carp Fishing.
Safe Unhooking Before Weighing
Unhook the carp while it is low and fully supported on the wet mat or cradle.
Have forceps or other suitable hook-removal tools within reach before fishing. Searching through a tackle bag while a carp is waiting on the mat adds unnecessary handling time.
First identify exactly how the hook is positioned.
If the hook is lightly held and accessible, support the fish and remove it carefully with forceps. Work with the direction of the hook rather than pulling against it.
Do not twist, wrench or repeatedly tug at a hook that is not coming free.
If the rig or hooklink is tangled around the fish, net or fins, deal with that first. Cutting the hooklink can sometimes be safer than trying to manipulate the entire rig around a struggling carp.
If the hook is awkwardly positioned, slow down.
The aim is not to remove it as quickly as physically possible. The aim is to remove it with the least additional damage.
After the hook is out:
- Check that no hook, hooklink or terminal component remains attached to the fish.
- Look briefly at the mouth for obvious damage.
- Remove loose line or debris if present and safe to do so.
- Allow the fish to settle before moving to the weighing sling.
Do not begin weighing while the hook is still attached or while terminal tackle is hanging around the fish.
If the carp is particularly stressed, very lively or has already required extended handling, weighing and photographs can be skipped.
The fish does not need to complete every stage of the routine simply because the equipment is available.
Unhook safely first. Weigh and photograph only when the fish and conditions allow it.
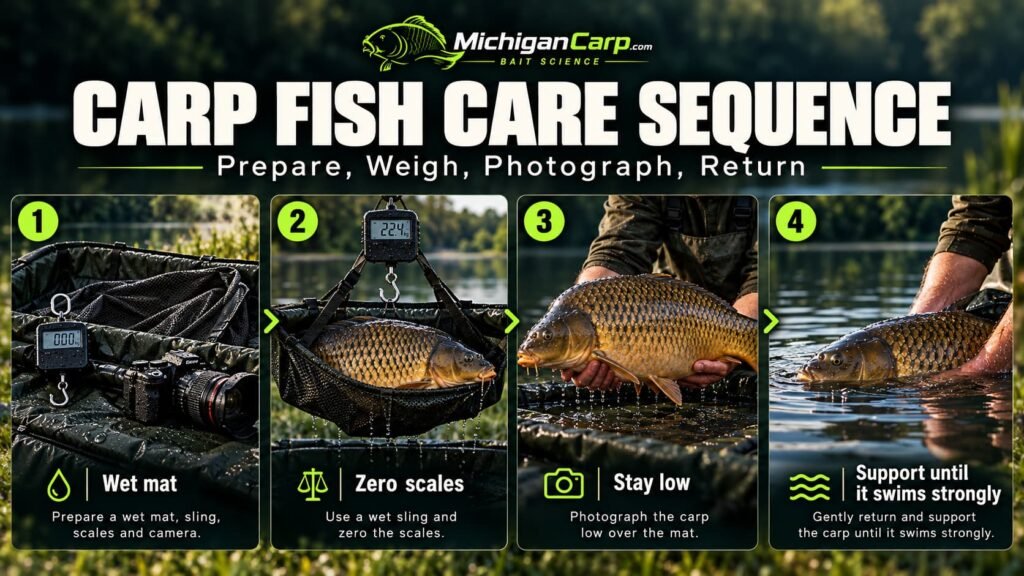
The sequence is simple:
PREPARE → WEIGH → PHOTO → RETURN → RECOVER → RELEASE
Prepare Everything Before the Carp Leaves the Water
Good fish care becomes much easier when the equipment is already ready.
Before fishing—or at the latest before the carp leaves the landing net—have the following organized:
- wet unhooking mat or cradle
- bucket or container of lake water
- wet weigh sling
- scales
- forceps and any other unhooking tools
- camera or phone if photographs are wanted
- safe route back to the water
Do not leave a carp on the mat while searching through tackle bags for the scales.
Likewise, do not wait until the fish is ready for a photograph before deciding where the camera is, unlocking the phone and asking someone to learn how to use it.
The safest routine is usually the quickest routine because most of the work has already been done.
For mats, slings, nets and scales, use Landing Gear for Carp Fishing.
Keep the Carp Wet and Properly Supported
A carp is built to have its body supported by water.
Once it is on the bank, that support disappears.
That is why large carp should be handled over a proper wet mat or cradle rather than dry grass, gravel, concrete, timber decking or bare ground.
Wet your hands before handling the fish.
Keep the fish horizontal and support the body rather than allowing weight to hang from one point.
Avoid placing fingers into the gills or eye sockets and do not lift a carp by the mouth, jaw, tail wrist or gill cover.
The basic MichiganCarp rule is:
Low, wet, supported and calm.
If the fish begins to tense, twist or kick, do not squeeze harder.
Lower it immediately back onto the mat or cradle and allow it to settle.
Carp Fish Care During Weighing
Before the carp goes into the sling, check that the scales, hook or weigh bar, lifting straps and sling are all secure and rated for the size of fish you expect to handle. Make sure the scales are working properly and set to the correct unit before lifting.
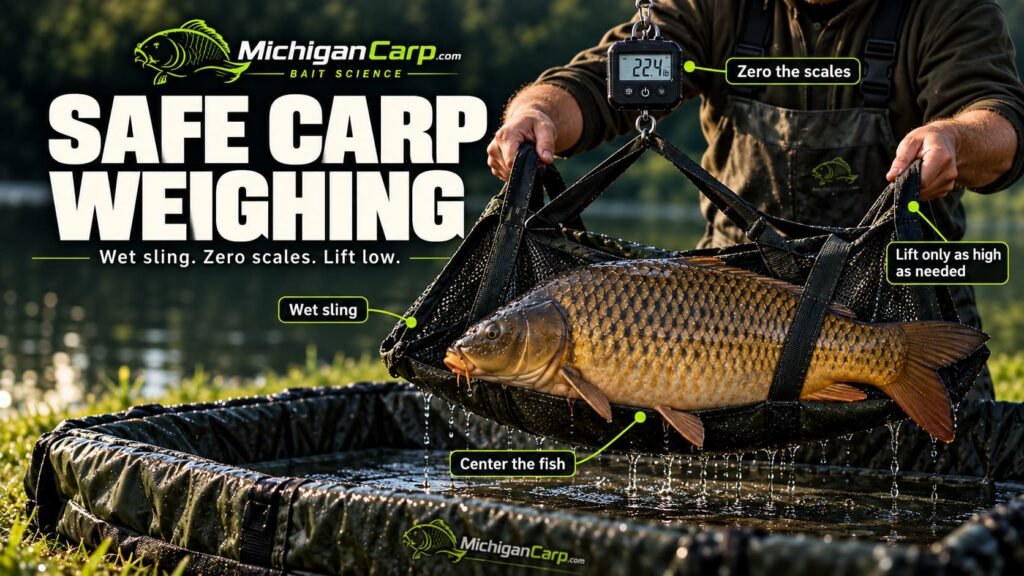
Keep the fish directly above the wet mat or cradle while weighing. The sling should only be raised far enough for the scales to take the full weight and settle; there is no reason to move a suspended carp away from the protected area.
If the fish begins struggling in the sling, lower it immediately back onto the mat, let it settle and check that the fins and body are still positioned correctly before trying again.
The safest weighing routine begins before the carp enters the sling.
Wet the Sling First
A dry weigh sling should not be placed directly around a carp.
Wet the sling thoroughly with lake water first.
Lay it flat across the mat or cradle so the fish can be transferred with minimal lifting.
Zero the Scales With the Sling Attached
Attach the wet empty sling to the scales and set the reading to zero.
This means the final reading represents the fish rather than the fish plus the sling.
If the scales cannot be zeroed reliably, record the sling weight separately and subtract it accurately.
Position the Carp Carefully
Place the carp into the center of the sling.
Before closing or lifting it, check:
- the body is centered
- the tail is inside
- the pectoral fins are lying naturally against the body
- no fin is folded awkwardly through a strap or opening
- the sling is properly fastened
- the lifting straps are not twisted
Never assume the fish is correctly positioned simply because the sling has closed.
Lift Only as High as Necessary
You do not need to lift a carp high into the air to obtain a weight.
Keep the sling above the mat or cradle whenever practical and lift only enough for the scales to take the full weight and settle.
For very large carp, a second person can make the process considerably safer.
One person can control the scales while the other watches the fish, sling and mat.
Check that the sling is fully zipped or fastened before any lift.
Do Not Chase a Number at the Expense of the Fish
The weight matters to us.
It does not matter to the carp.
If a fish is particularly lively, conditions are difficult or something about the weighing process does not feel safe, the correct decision can be to skip the weight.
Likewise, there is rarely a good fish-care reason to weigh the same carp repeatedly because the first reading was not quite what you hoped to see.
If accuracy matters, prepare properly before the first lift.
A properly zeroed sling, suitable scales and a controlled lift are better than repeatedly handling the fish.
For a personal-best capture, taking a quick photograph of the scale reading can help you retain the information without prolonging the process.
Safe Carp Photos
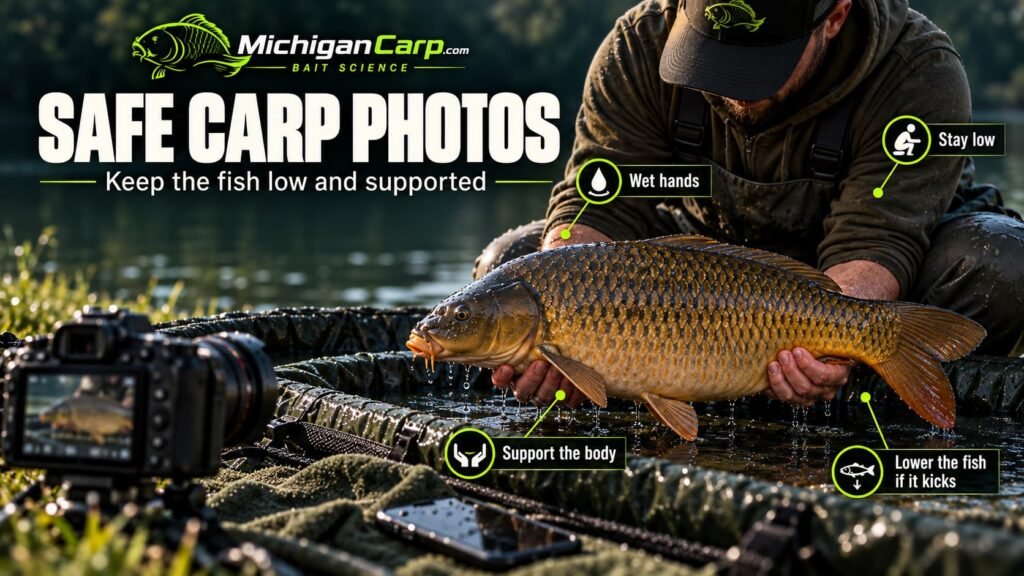
Carp photography does not require standing up with the fish.
The standard MichiganCarp photograph should be taken kneeling or crouching low over a wet mat or cradle.
That way, if the fish moves suddenly, the distance it can fall is minimal.
Support the Fish Horizontally
Use two wet hands and support the carp underneath.
One hand should support the forward part of the fish around the pectoral/chest area without entering the gills.
The other supports the rear half of the body.
The exact hand position will vary with the size and shape of the fish, but the principle does not:
the body should be supported rather than suspended.
Do not squeeze the abdomen.
Do not grip through the gill cover.
Do not support the whole fish from the tail.
Keep the Carp Close to Your Body
Holding a fish dramatically toward the camera can make it look larger, but it also moves the carp farther away from the safety of your body and the mat.
A natural low hold gives a more honest photograph and usually provides better control.
For a large carp, control matters more than creating an exaggerated perspective.
Watch the Fish, Not Just the Camera
Carp often signal movement before they kick.
The body may stiffen, the tail may begin to tense or the fish may start flexing.
If you feel that change:
lower the fish.
Do not try to overpower a large carp once it begins struggling.
A photograph can always be taken again after the fish settles.
An injured carp cannot be un-dropped.
Prepare the Camera First
Before lifting the carp:
- frame the shot
- choose the orientation
- check exposure
- clean the lens
- set any timer or remote
- tell the photographer where to stand
Then lift the fish once.
Take a few usable photographs.
Put it back down.
That is much better than repeatedly lifting and lowering the same carp while changing settings and experimenting with poses.
Solo Carp Photography
Fishing alone does not mean fish care should become more difficult.
It does mean preparation matters even more.
A phone or camera with a timer, remote shutter, interval mode or voice control can work well if it is set up before the fish is lifted.
Position the camera while the carp is safely supported on the mat or, where practical, recovering in the landing net or sling in the water.
Take a test photograph without the fish if necessary.
Once everything is ready, lift the carp low over the mat and take the photographs efficiently.
Do not repeatedly pick the carp up because framing is wrong.
The camera should adapt to the fish-care routine, not the other way around.
When to Skip the Photograph
A photograph is never more important than the fish.
Consider skipping it when:
- the carp is showing signs of severe exhaustion
- the fish is repeatedly struggling on the mat
- air temperature or direct sun makes prolonged handling undesirable
- the bank or mat position is unsafe
- the fish has already spent longer than necessary out of the water
- you are alone and cannot control the process confidently
There will always be another photograph.
Protecting the carp should take priority.
Keep Air Exposure as Short as Practical
Research on catch-and-release fishing across a range of species shows that capture, exercise, handling and air exposure can all contribute to physiological or behavioral disturbance.
Not every study applies directly to common carp, and there is no useful universal stopwatch number that guarantees safety for every fish in every condition.
The practical response is therefore straightforward:
do not keep a carp out of water longer than the weighing, unhooking and photograph genuinely require.
Preparation is the best way to reduce unnecessary delay.
The Angling Trust Carp Challenge Fish Handling Guidelines similarly emphasize having equipment prepared, using a wet sling, keeping photographs low and returning the fish safely.
For the broader science behind catch-and-release stress, see Best Practices for Catch-and-Release Recreational Fisheries and the review The Physiological Consequences of Catch-and-Release Angling.
Hot Weather Requires Extra Discipline
Warm-water sessions deserve particular care.
Warmer water generally holds less dissolved oxygen than cold water, and a carp may already have experienced substantial exertion during the fight.
That does not mean carp cannot be safely photographed in summer.
It means the angler should be organized.
Avoid leaving the fish exposed while equipment is prepared.
Keep the mat shaded where possible.
Keep the fish wet.
Complete unnecessary handling quickly.
If the fish appears slow to recover, the photograph is not the priority.
Use Dissolved Oxygen and Carp Fishing for the wider oxygen context.
Moving the Carp Back to the Water
A large carp should normally be returned using equipment designed to support its full body.
A wet weigh/retention sling is often the safest option for moving a large fish from the mat to the water.
Check that all zips and fastenings are secure and that the fish is positioned correctly before lifting.
Keep the sling low while moving.
Do not carry a large carp loose in your arms across rocks, mud, steep banks or uneven ground.
If the bank requires a difficult climb, awkward step or unstable descent, that should have been considered before fishing the swim.
Fish care begins with choosing a landing area that allows the carp to be returned safely.
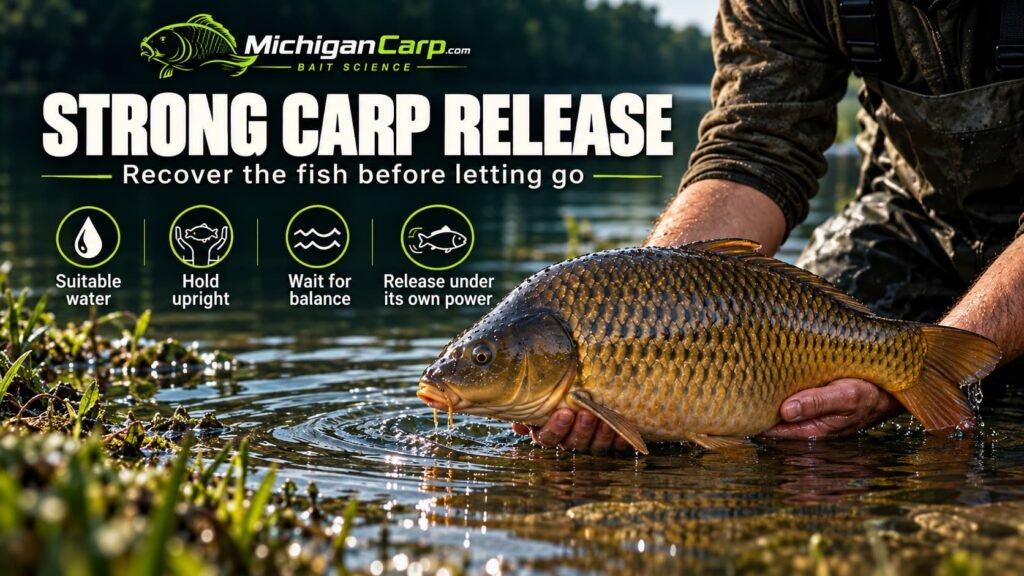
Strong Release
Do not throw a carp back into the lake.
Do not slide it down a steep bank.
Do not release it simply because it moved its tail once.
Move the fish into suitable water and allow it to regain orientation.
Support the carp upright so water can pass naturally across the gills.
You should feel the fish begin to hold its own balance rather than relying entirely on your hands.
A well-recovered carp will normally become increasingly purposeful.
When it can maintain itself upright and shows strong, coordinated movement, allow it to swim away under its own power.
Do not force the release simply to finish the process quickly.
Watch the First Few Seconds
After letting go, watch the fish.
A good release should result in controlled swimming rather than the carp rolling onto its side, drifting helplessly or immediately becoming trapped in weeds or rocks.
If conditions allow and the fish remains within reach but clearly cannot maintain itself, support it again.
Do Not Release Into the Wrong Water
The release point matters.
Avoid placing an exhausted carp directly into:
- thick shoreline weed
- sharp rocks
- heavy wave wash
- shallow hot water when better water is immediately available
- strong current it cannot yet hold against
- a boat lane
- areas where the fish can become stranded
Where possible, return it to stable water deep enough for the fish to remain upright and leave without immediately encountering another obstacle.
What About Retention Slings?
A retention sling can be useful for keeping a carp safely in the water for a short period while necessary equipment is prepared.
It should not become an excuse to hold a fish unnecessarily.
If used, make sure:
- the sling is designed for retaining carp
- the fish remains fully submerged
- the water has adequate depth and circulation
- the sling cannot collapse around the fish
- it is securely attached
- the carp cannot reach rocks, snags or shallow margins
- local fishery rules permit its use
On public Michigan water, the simplest approach is normally to prepare properly beforehand and minimize retention.
The Whole Process Should Be Calm
Fish care often goes wrong because the capture creates excitement.
A big carp arrives in the net and suddenly several things happen at once.
Someone looks for the scales.
Another person wants a photograph.
A camera battery is flat.
The sling is still dry.
The mat has not been positioned.
Meanwhile the carp is waiting.
Good organization removes most of that pressure.
The correct order is boring—and that is exactly why it works:
prepare → land → unhook → weigh if wanted → photograph if wanted → return → recover → release.
There should be very little improvisation.
MichiganCarp Practical View
After decades of carp fishing, including handling large wild carp, I see weighing and photographs as privileges attached to the capture rather than the purpose of it.
I want the weight.
I want a good photograph.
But neither is worth making the fish-care process harder than it needs to be.
With a big wild common, especially one that has fought hard in warm water or around weed, the first question after landing should not be:
How quickly can I get the camera?
It should be:
Is everything ready to handle this fish safely?
If it is, weighing and photographs can be completed calmly and efficiently.
If it is not, fix the fish-care problem first.
The best capture photograph is one followed by the carp swimming away strongly.
Common Fish-Care Mistakes
Weighing in a Dry Sling
Wet the sling before the carp enters it.
Forgetting to Zero the Scales
Zero the wet sling before weighing whenever the scales allow it.
Lifting Too High
The fish only needs to clear the mat sufficiently for an accurate reading.
Standing With the Carp
Stay kneeling or crouched over a proper mat or cradle.
Holding the Fish Too Far Forward
Keep the carp close enough to remain controlled and supported.
Ignoring the Warning Kick
If the fish tenses, lower it.
Taking Too Many Photographs
Get the camera ready first and take a small number of useful frames.
Treating the Weight as Mandatory
If weighing becomes unsafe, skip it.
Releasing Too Soon
Allow the fish to regain balance and coordinated swimming.
Keeping the Carp Out Because Everything Is Not Ready
Preparation should happen before the fish needs it.
Frequently Asked Questions
Should I wet a weigh sling before weighing a carp?
Yes. Wet the sling with lake water before placing the fish into it, then zero the scales with the wet sling attached where possible.
How high should I lift a carp when weighing it?
Only high enough for the fish and sling to clear the mat and allow the scales to settle. There is no reason to lift a carp unnecessarily high.
Should I stand up when holding a carp for a photograph?
No. For routine carp photography, kneel or crouch low over a large wet mat or cradle.
How should I hold a carp for a photograph?
Support the fish horizontally with wet hands beneath the body. Keep away from the gills and eyes, do not squeeze the abdomen and lower the carp immediately if it begins to struggle.
How long can a carp stay out of the water?
There is no sensible universal time that guarantees safety in every situation. The practical standard is to minimize unnecessary air exposure and prepare equipment beforehand so weighing and photographs can be completed efficiently.
Do I have to weigh every carp?
No. Weighing is optional. If the fish is difficult to handle or conditions make weighing unsafe, returning it safely is more important.
Do I need to photograph every carp?
No. Photographs are optional as well.
How do I know when a carp is ready to release?
The fish should be upright, able to maintain its balance and showing strong, coordinated swimming behavior.
Should I throw the carp back once it is recovered?
No. Support the fish in suitable water and allow it to swim away under its own power.
Can I carry a carp back to the lake in my arms?
A proper wet sling provides better full-body support and security, particularly with large carp or uneven banks.
Next Steps
Use this article with the wider MichiganCarp fish-care system:
- Carp Fish Care and Safety — the main fish-care hub.
- Landing Gear for Carp Fishing — nets, mats, slings and scales.
- Carp Line and Leaders — reduce avoidable tackle failure around weed, rock and zebra mussels.
- Dissolved Oxygen and Carp Fishing — understand warm-water and oxygen conditions.
The final fish-care rule is simple:
The weight and photograph record the capture. The release completes it.